I have hated printers for most of my life, not because I hate technology, but because conventional printers have somehow managed to remain frustrating despite decades of evolution. You send a document, wait, something goes wrong, and suddenly you’re troubleshooting a machine that was supposed to print a few pages. So when I got my hands on the Bambu Lab A2L, my first proper interaction with a 3D printer, I was curious for a completely different reason. 3D printing has always felt more interesting to me because the idea isn’t just about putting ink on paper. You’re essentially turning a digital model into a physical object.
Bambu Lab A2L 3D Printer
Rs 72,999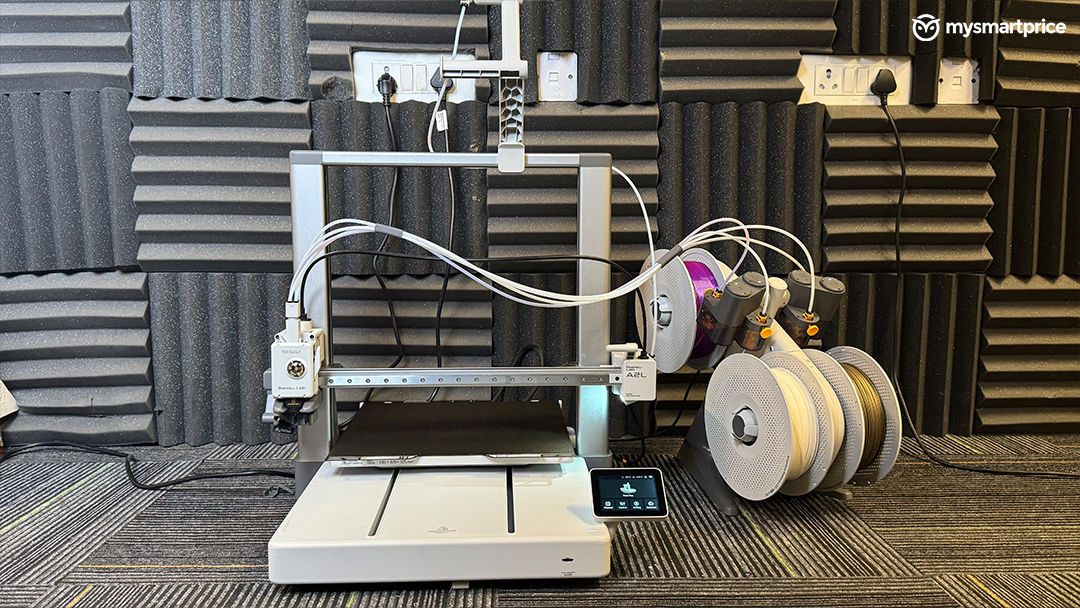
What Is Good?
- Excellent print quality
- Easy setup and calibration
- Great Bambu app experience
- Multi-colour printing support
What Is Bad?
- Maintenance can be frustrating
- Not completely beginner-proof
- Expensive at Rs 72,999
After using the A2L, I can say this: 3D printing is genuinely fascinating, but it isn’t as plug-and-play as I initially expected. The A2L is a large-format printer with a 330 x 320 x 325mm build volume and a maximum print speed of 500mm/s. It also supports multi-colour printing through Bambu Lab’s AMS ecosystem, but my experience with it wasn’t just about what the printer can technically do. It was about what it feels like to actually learn 3D printing when you’ve never touched a 3D printer before.
Setting It Up Is Surprisingly Easy
The first thing that surprised me about the A2L was how straightforward the setup process was. If you know your way around technology and aren’t afraid of doing a little bit of hardware work, getting the printer ready isn’t particularly intimidating. There are a few things you need to assemble and connect, but the process itself is quite approachable.
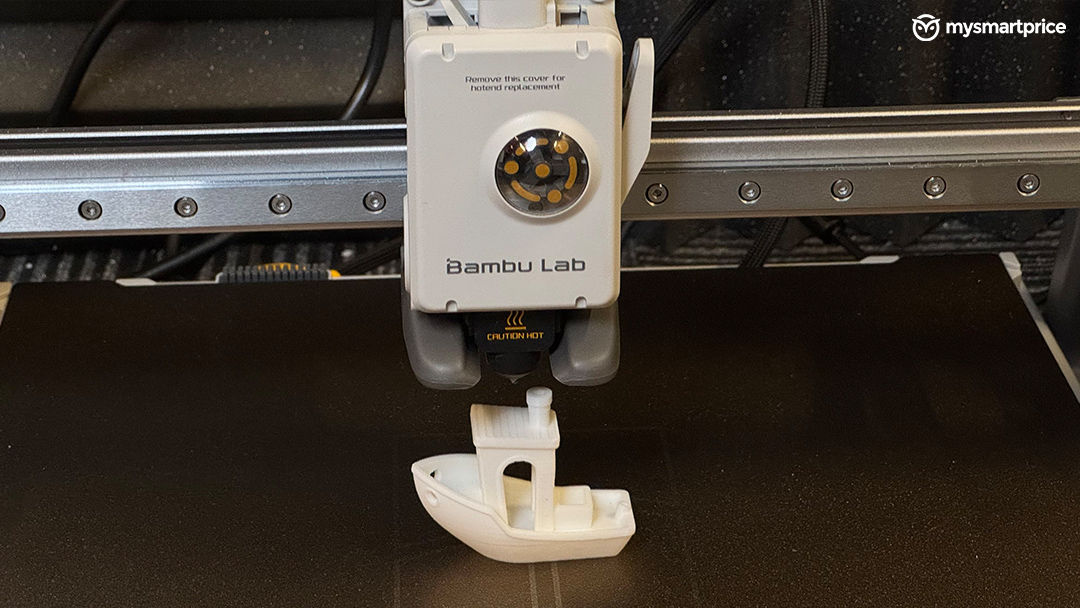
Calibration is also fairly straightforward, which is important because this is the part I expected to be intimidating as a first-time user. The printer handles a lot of the calibration process for you, so you don’t have to immediately understand every aspect of how a 3D printer works before getting your first print. However, I would strongly recommend placing the printer on a stable surface. This is not something I’d casually put on a flimsy table. Ideally, use the ground or a properly built, sturdy slab where the printer can remain stable while it’s working. The A2L itself is designed around stability, with adaptive vibration compensation and integrated dampers to reduce resonance during printing. As someone using a 3D printer for the first time, I was genuinely surprised by how easy the initial setup was. If you’re reasonably comfortable with technology or can follow basic instructions, then I don’t think that you will find this to be a cumbersome process.
The AMS Is Brilliant, Once You Understand What It’s Doing
The AMS is probably one of those things that makes a lot more sense after you’ve actually used it, For a first-time user like me, however, the filament management process was initially confusing. Before starting a new print, I found myself dealing with filament extrusion and loading in ways I wasn’t immediately comfortable with.
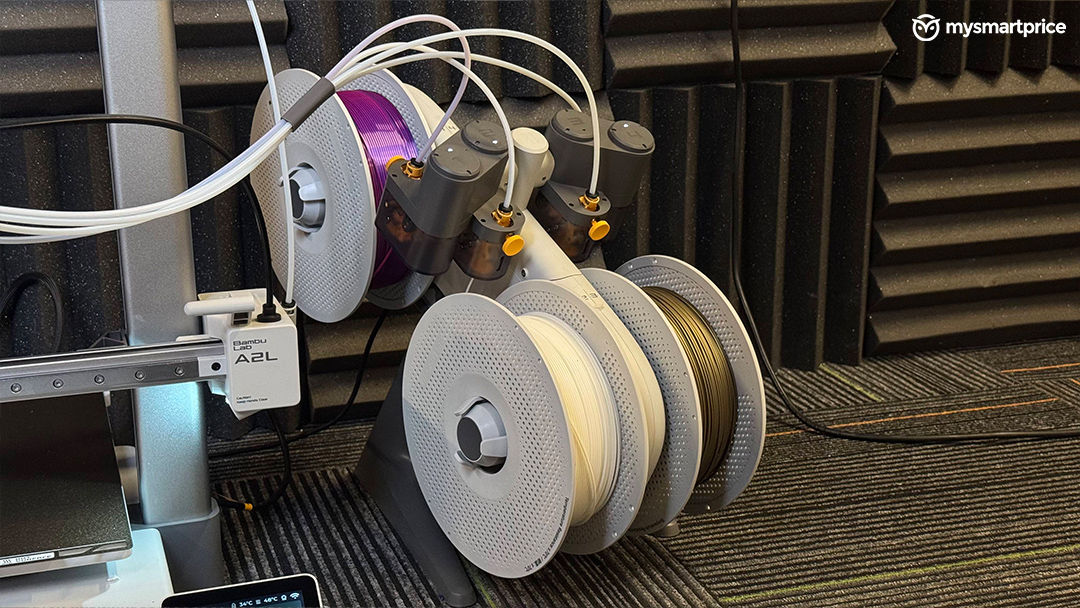
And yes, it irritated me. The AMS itself is designed to automatically manage filament feeding and switching, and Bambu Lab’s system uses multiple sensors to monitor things like filament position, speed and tension, but understanding what the printer is doing and actually getting comfortable with it are two different things.
The first few times, I found myself wondering why the printer was doing certain things before a print even started. Once I got used to the workflow, though, it became much easier. That’s especially true when you’re dealing with different colours or materials. The whole point of the AMS is to make that process easier, but there is still a learning curve, particularly if you’ve never dealt with filament management before. Once I got used to it, though, I started appreciating why the system exists.
The Print Quality Can Be Seriously Impressive
This is where 3D printing finally clicked for me. The print quality isn’t simply about how good the printer is. A lot depends on the model you’re printing and the filament you’re using.
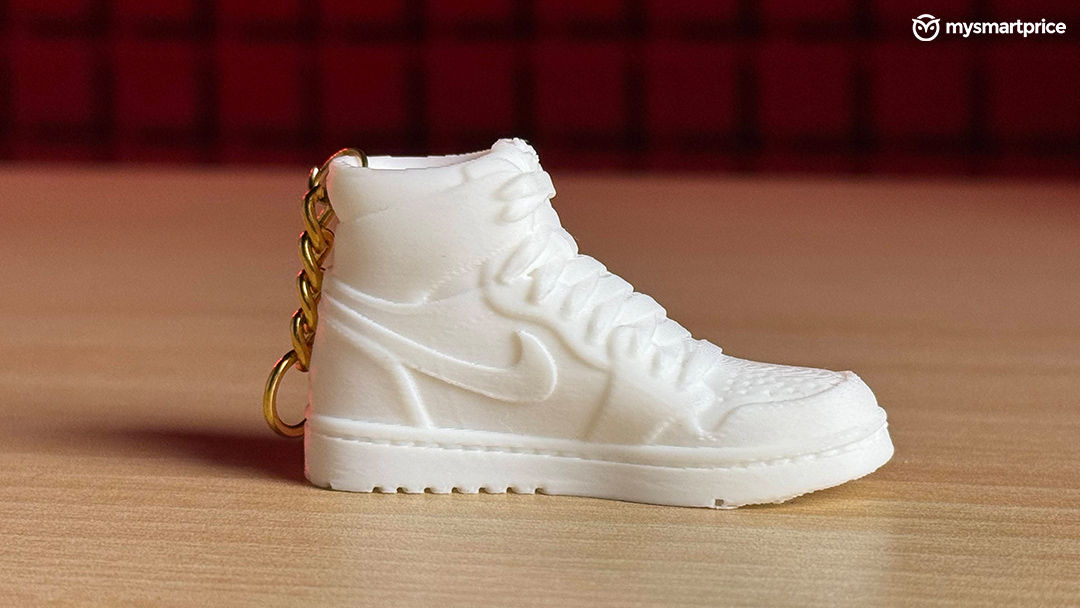
During my testing, I used PLA Basic and PLA Silk, and I tried printing the same model with both materials. The difference was noticeable, but the PLA Basic print particularly impressed me. One of the models I printed was a keychain that my colleague wanted, and seeing a digital model actually turn into a physical object that you can hold is still a pretty cool experience. The A2L supports PLA, PETG, and other non-engineering filaments, with a 300°C maximum nozzle temperature and an 80°C maximum bed temperature. The print quality was probably the moment when I went from being curious about 3D printing to actually getting excited about it. The level of detail from something I had only seen on a screen was genuinely satisfying.
The Screen Does Most Of The Heavy Lifting
One thing I appreciated about the A2L is that you don’t constantly have to reach for a laptop to control the printer. The onboard screen handles many of the important functions, making the printer feel more self-contained once you’ve started using it.
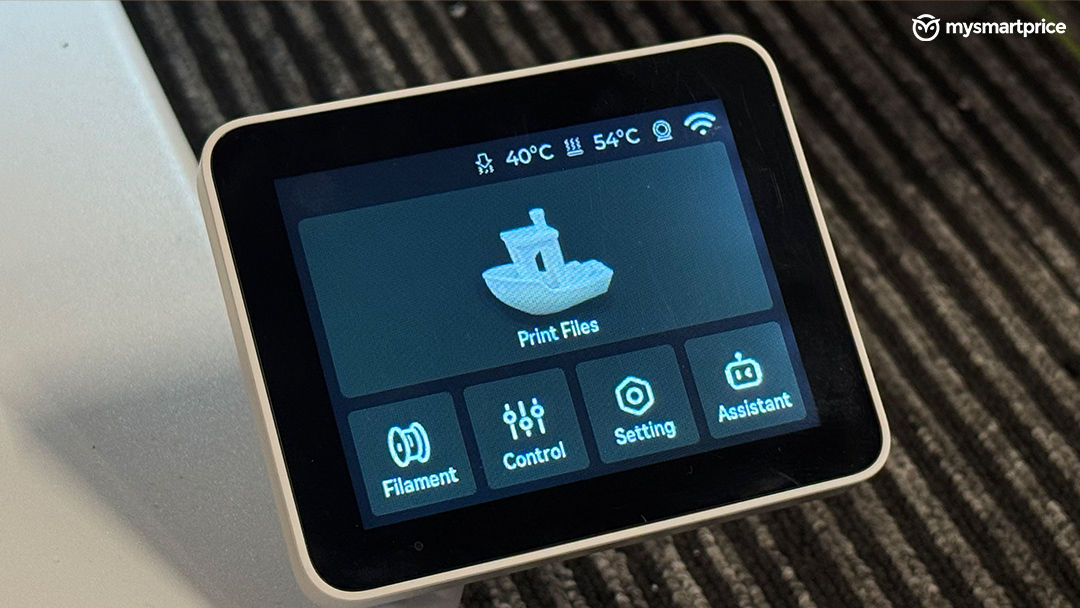
There’s also local storage involved, so models that have already been printed can be accessed again without having to start the entire process from scratch. That might sound like a small convenience, but when you’re experimenting with different models, being able to quickly access something you’ve already used makes the workflow much easier. As a beginner, having the important controls right in front of me made the learning process less intimidating.
The Bambu App Is Probably My Favourite Part
If there’s one part of the software experience that I immediately liked, it’s the app. Connecting the printer was straightforward, and the ability to send prints through the cloud makes the entire workflow feel much more modern than what I expected from a 3D printer. Instead of thinking about a 3D printer as a standalone machine sitting on a desk, the app makes it feel like part of a connected ecosystem. Bambu Lab also positions Bambu Handy and Bambu Studio as part of its broader ecosystem, allowing users to move between model selection, slicing and printer management.
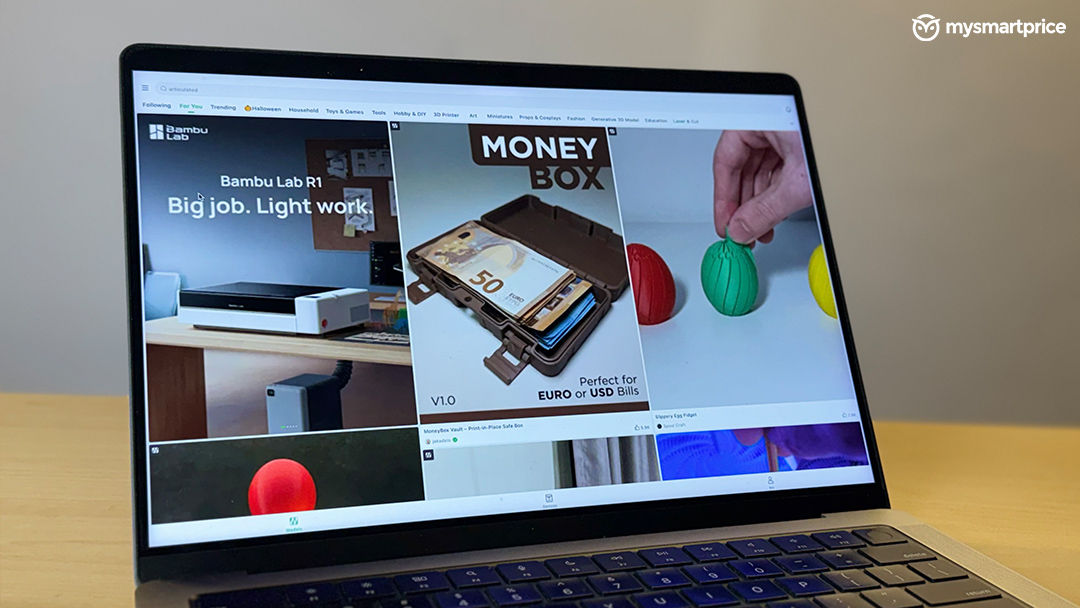
For someone like me, that accessibility matters. This is one area where Bambu Lab has done a really good job of making a relatively complicated hobby feel more approachable.
Multi-Colour Printing Is Cool, But It Isn’t Perfect
Multi-colour printing is one of the reasons I was particularly interested in the A2L and AMS. The idea is fantastic. You can take a model and print it in multiple colours without manually changing filament throughout the process.
But during my testing, I did run into some issues with two-colour prints. I even tried connecting the printer to my laptop and using a build tower to work around the problem. Some of the issues could potentially have been a device-specific glitch, so I wouldn’t necessarily treat my experience as a universal limitation. The A2L can be expanded to support multiple AMS units, so the broader multi-colour ecosystem is considerably more capable than what I tested. I wouldn’t write the feature off because of my experience, but I’d definitely say there’s still a learning curve involved.
Maintenance Is Where My Love For 3D Printing Was Tested
If setup was the easy part, maintenance was the exact opposite. This is where my lack of experience with 3D printers really showed. When something goes wrong, you can’t always just press a button and move on. You need to understand what caused the problem, where the filament is stuck, what needs cleaning, or what part needs attention. Understanding was just the start, but getting things moving was a bigger challenge. During the testing period, there were moments when a print stopped automatically, and considerable time went in fixing. While automatic detection on this gadget is useful because it can prevent a bad print from continuing indefinitely, figuring out what went wrong wasn’t always as straightforward.
This is probably the biggest difference between using a regular consumer gadget and using something like a 3D printer. You’re not just operating the machine. You’re also learning how the machine works. The printer can do a lot automatically, but it doesn’t completely remove the need for the user to understand what’s happening.
The Power-Loss Recovery Is A Feature I Really Appreciate
One feature that genuinely impressed me was the ability to resume a print after a power cut. A 3D print can take hours, sometimes considerably longer depending on the model, so losing an almost-finished print because the electricity goes out would be incredibly frustrating. The A2L supports power-loss recovery, which means the printer can resume the job rather than simply treating the interruption as the end of the print.
And this is the sort of feature I appreciate because you don’t think about it until you actually need it. A power cut shouldn’t mean hours of printing go straight into the bin.
The A2L Is More Delicate Than It Looks
There’s one thing I’d tell every first-time user before they start using this printer: don’t treat it like a completely idiot-proof appliance. The A2L can automate a lot of the difficult parts of 3D printing, but that doesn’t mean mistakes are harmless. A small mistake during setup, filament handling, or maintenance can potentially turn into a much bigger problem. And because I was learning everything from scratch, I had to be much more careful than I initially expected. That’s also why I think having a stable surface and spending some time understanding the printer before immediately jumping into complicated models is important.
The A2L is beginner-friendly in many ways, but I wouldn’t call it beginner-proof. That’s an important distinction. The printer makes 3D printing easier, but it doesn’t eliminate the need to learn how 3D printing actually works.
The Bambu Lab A2L Made Me Like 3D Printing
The funny thing about reviewing the Bambu Lab A2L is that I went into this having never used a 3D printer before to actually falling in love with the device.
I expected the setup to be complicated. It wasn’t.
I expected printing to be boring. It wasn’t.
I expected the first few prints to be disappointing. They weren’t.
What I didn’t expect was how much of the experience would be about learning. The printer can automate calibration, manage filament, connect to an app, resume prints after power cuts and produce genuinely impressive objects, but you still need to understand what you’re doing when something goes wrong. That’s probably the biggest takeaway I have from using the A2L.
It’s not just a printer. It’s an introduction to a completely different kind of making. The app is excellent, the print quality with the right model and filament can be genuinely impressive, the AMS adds a lot of flexibility, and features like power-loss recovery make the machine considerably more practical, but maintenance can be frustrating, multi-colour printing wasn’t completely trouble-free in my testing, and the machine is delicate enough that small mistakes can quickly become bigger problems.
Would I recommend the A2L to someone who has never touched a 3D printer? Yes, but with one condition: the person should be willing to learn. As my first experience with 3D printing, the A2L made the process accessible enough for me to get started while still giving me plenty to learn. And honestly, that’s what made the experience interesting. At Rs 72,999 The Bambu Lab A2L is an impressive entry point into large-format 3D printing. It makes the initial experience approachable, produces excellent results with the right combination of model and filament, and its connected ecosystem is genuinely useful. It isn’t completely frustration-free, particularly when maintenance or multi-colour printing enters the picture, but for someone willing to learn, it can turn 3D printing from something you’ve only watched online into something you can actually make yourself.