Do you have a JSON file that you’d like to convert to an MS Excel file or XLSX file? If you are feeling lost in the process of this conversion, don’t worry, in this guide, we will take a look at how one can convert the JSON file to an Excel file format using Microsoft Excel’s built-in tools like Power Query editor. In addition to the MS Office method, there are also some other easy methods to convert a JSON to an excel file and we will take a look at the top five third-party websites as well.
The processor is pretty simple on MS Excel, you first need to import the JSON file and connect it. Next, you will have to review certain things and clean the data in case necessary. Once these steps are done, you can load the data to MS Excel and save it as an excel file. Let’s get started with understanding what exactly is JSON.
Also Read: MS Excel Shortcut Keys: Best Microsoft Excel Keyboard Shortcuts for Windows and macOS Computers
What is a JSON File?
First things first, JSON stands for JavaScript Object Notation. It is a standard text format for storing and transporting data. This is commonly used for transmitting data in web applications and thus, this is a popular file extension and a popular term among the web development crowd.
Why Convert JSON to Excel?
As said earlier, JSON is a popular file expansion when it comes to web developers and web enthusiasts. However, not everyone is familiar with this format and thus converting a JSON file to Excel can be helpful as excel is better readable and also easy to use. In a nutshell, saving, editing, and viewing XLSX is better than the JSON file. And in addition, Excel offers additional features for analytics and calculations. Once you have converted JSON to an XLSX file, you can use it anywhere on spreadsheet apps.
How to Convert JSON File to Excel File Using Inbuilt Tool in MS Excel
- Open MS Excel on your computer
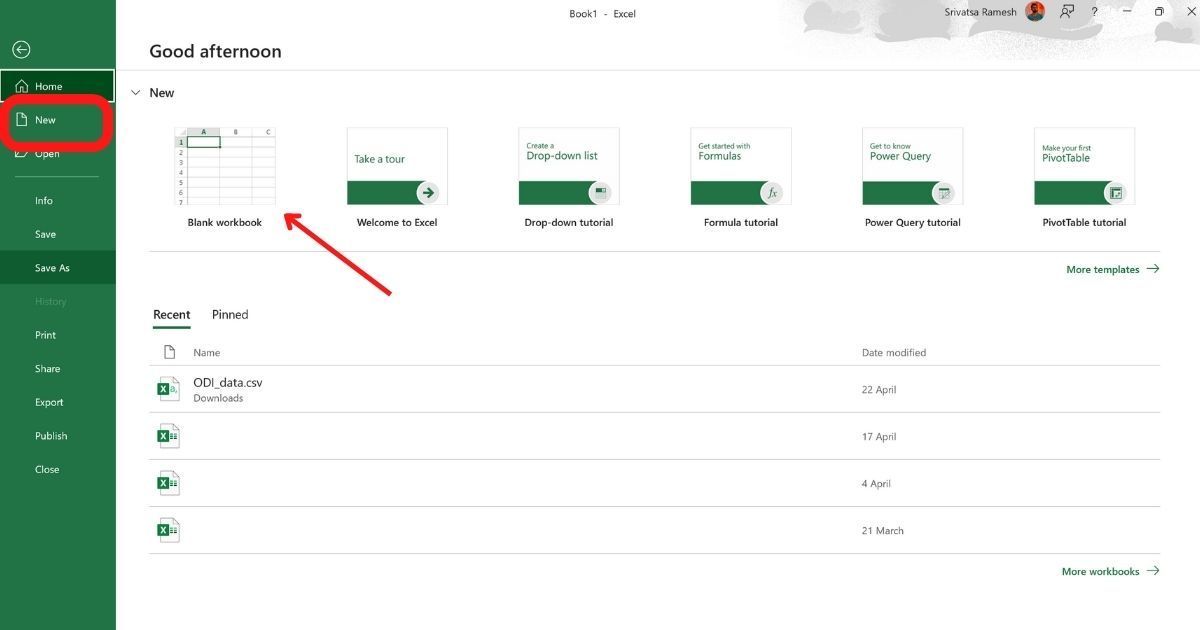
- Select New Excel and Blank Workbook
- Go to Data Tab and Click on “Get Data”
- Click on “From File” and select From JSON
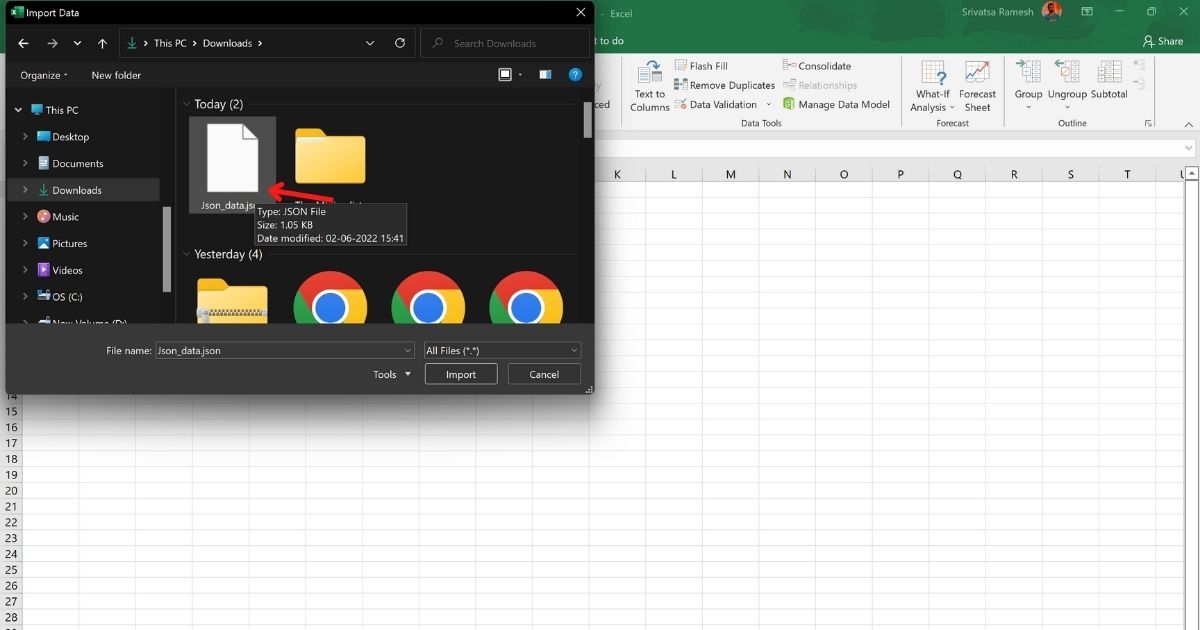
- A new file manager window will pop up, and select the JSON file by navigating to the stored location (In our case in downloads)
- Double click on the JSON to import
- MS Excel will now open a Power Query Editor in a new tab (You can decide how JSON’s data will be loaded in your Excel)

- On the top left of the window, click the “To Table” option. This option will turn the data into a table

- Now click on OK
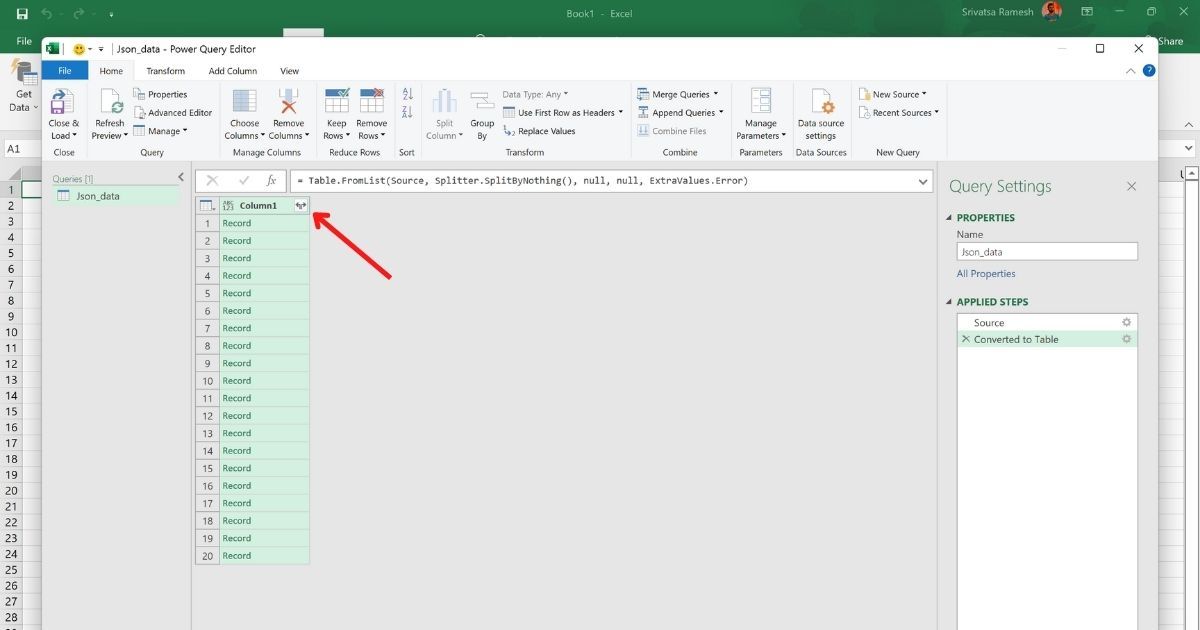
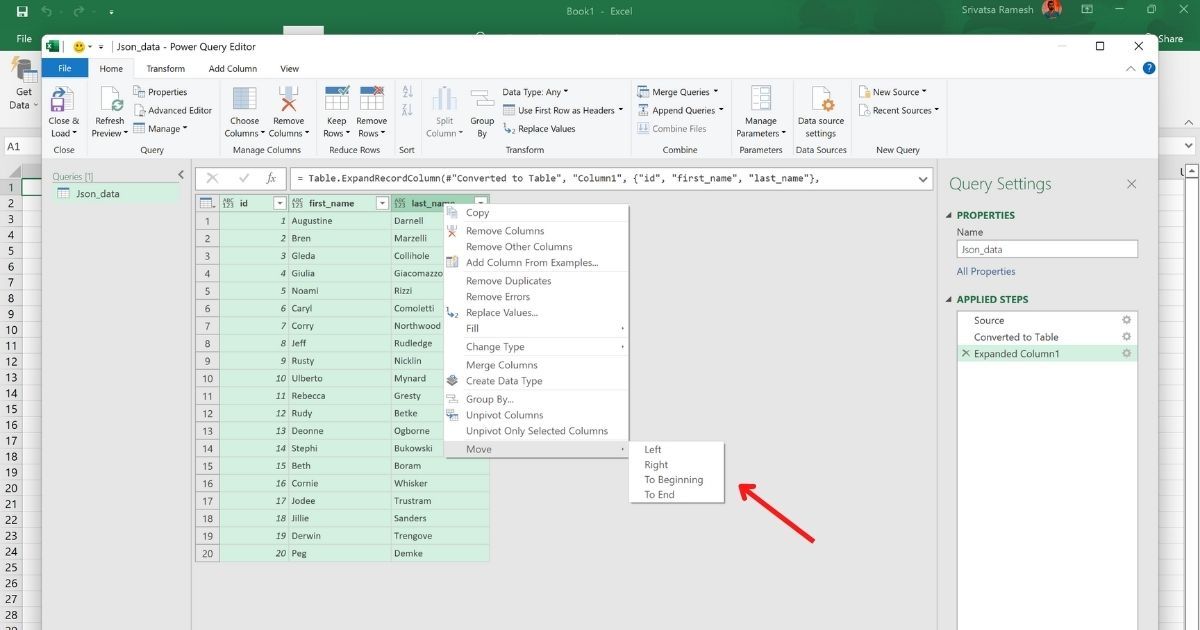
- Click on the double-arrow icon next to “Column1,” to see all the columns on the sheet
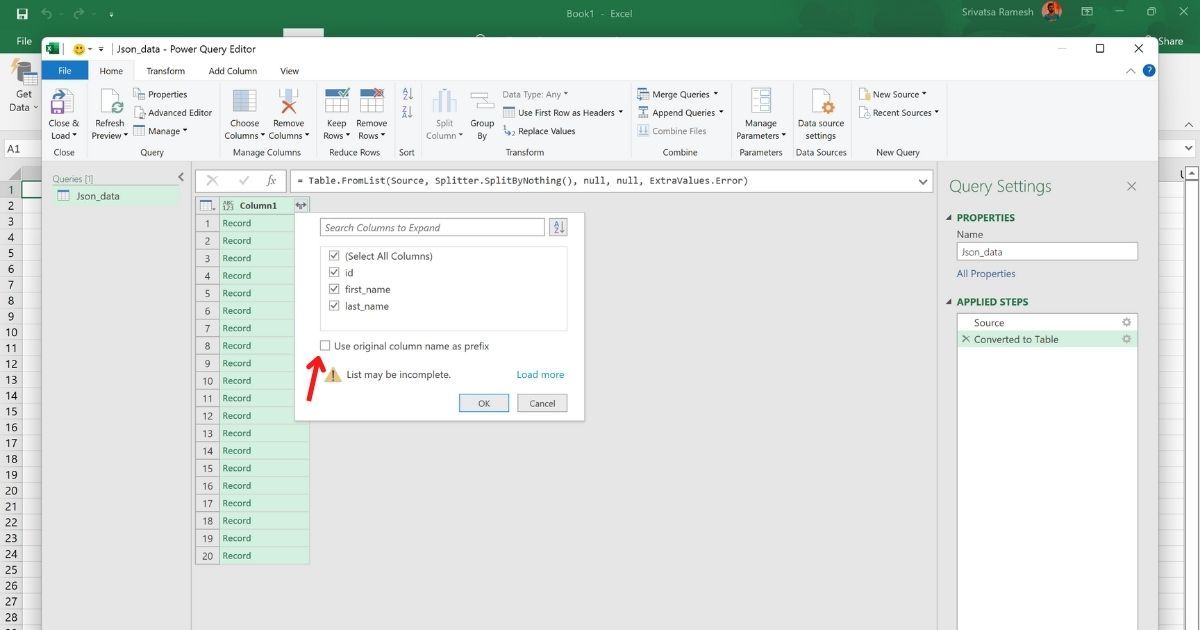
- A new pop-up will open, de-select the “Use Original Column Name as Prefix” option and click “OK”
- Now the JSON file will be visible as Excel with columns and rows
- If you’d like to edit or change anything in the table, you can do so by using the options present on the top
- When you are done, click on “Close & Load” in the top left corner
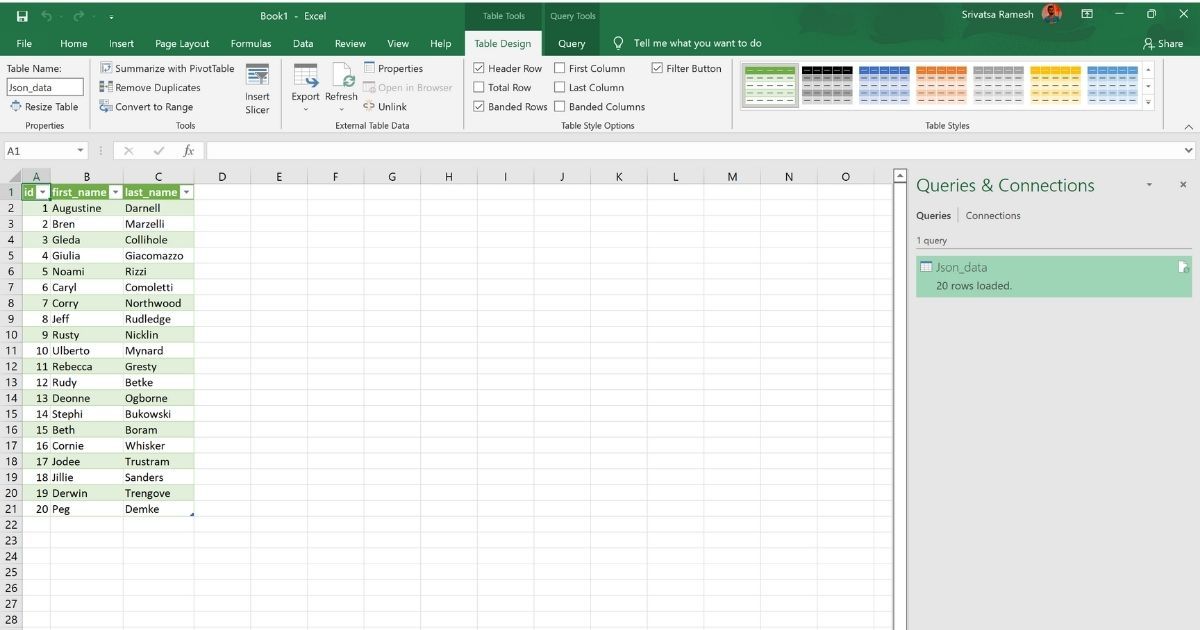
- Now your JSON file will be displayed as an Excel file in the MS Excel
- In case you want to play around with formatting, styling, and adding anything specific, you can do just like you’d do on a regular Excel file
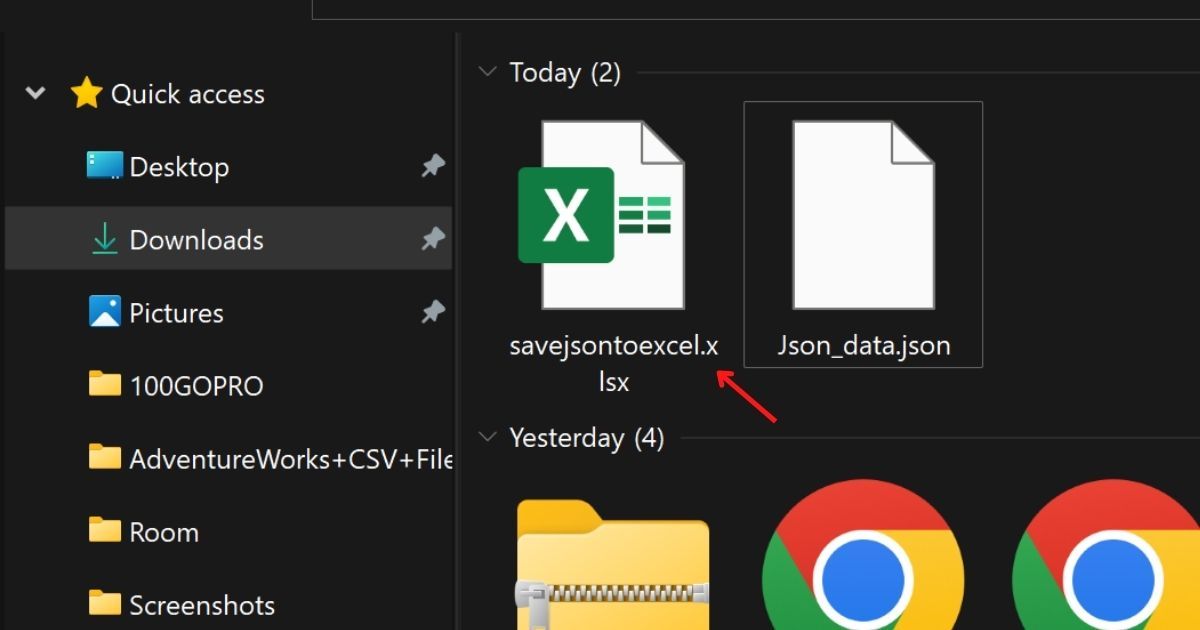
- The final step is to convert the JSON file to Excel using by saving the file. Click on “File” > Save
- A new folder window will open, select a folder where you want to save the file, enter Here, select a folder to save your file in, type a name for your file, and click “Save”
The Excel file converted from JSON will be saved in the designated folder.
Best Third-Party Tools to Convert JSON File to Microsoft Excel File
The following are the five online websites that help you convert your JSON file to Excel in a few simple steps. All you need to do is just drag and drop the JSON file and hit the convert button and then download the Excel file. These are the five third-party websites we’d recommend:
Conversion Tools
- Visit the Conversion Tools webpage
- Click on the browse option
- Choose the JSON file you want to convert to an MS Excel file
- Select XLSX (Excele 2007+) or XLS (Excel 91-2007) option based on your preference
- Click on the “Run Conversion” option
- The JSON file will be uploaded
- Click on “Download File” to download the converted Excel file to your computer
Data Page
- Visit the Data Page website
- Click on the Upload JSON File button
- Choose the JSON file you want to convert to an MS Excel file
- Once the upload is completed, click on Excel File (XLSX) option
- The converted Excel file to your computer
Convert CSV
- Visit the Convert CSV webpage
- Click on the “Choose File” tab and then on the “Choose File” option
- Choose the JSON file you want to convert to an MS Excel file
- Once the upload is completed, select JSON To Excel option present in Step 3 of the webpage
- The converted Excel file to your computer
Aspose app
- Visit the Aspose app website
- Click on “Drag or upload your files”
- Choose the JSON file you want to convert to an MS Excel file
- In the save as option, make sure you have selected the “XLSX” option
- Choose Convert into one sheet or Convert into multiple sheets based on your need
- Hit the Convert to start the conversion
- Now, click on the Download Now button to get the MS Excel file on your computer
Table Convert
- Visit the Table Convert webpage
- Click on the “Upload JSON” option on the right
- Pick the JSON file you want to convert to an MS Excel file
- The website will preview the JSON data in the first half of the screen and in table format in the second half
- Scroll down and click on the Download option present in the Table Generator tab
- The converted Excel file will be now downloaded to your computer
Also Read: VLOOKUP Formula: What is It, How To Use VLOOKUP in Microsoft Excel with Example