When Sony introduced the new-age gaming console PlayStation 5, it paired it with the new-age controller DualSense. It is the first PlayStation controller to come with a built-in microphone, which allows you to chat with friends and other players during online multiplayer games without attaching an external microphone.
A dedicated button on the controller lets you disable the microphone whenever you want. However, some players prefer muting the DualSense microphone unless they need to speak. Here is how to do that.
How to Disable PlayStation 5 DualSense Microphone by Default
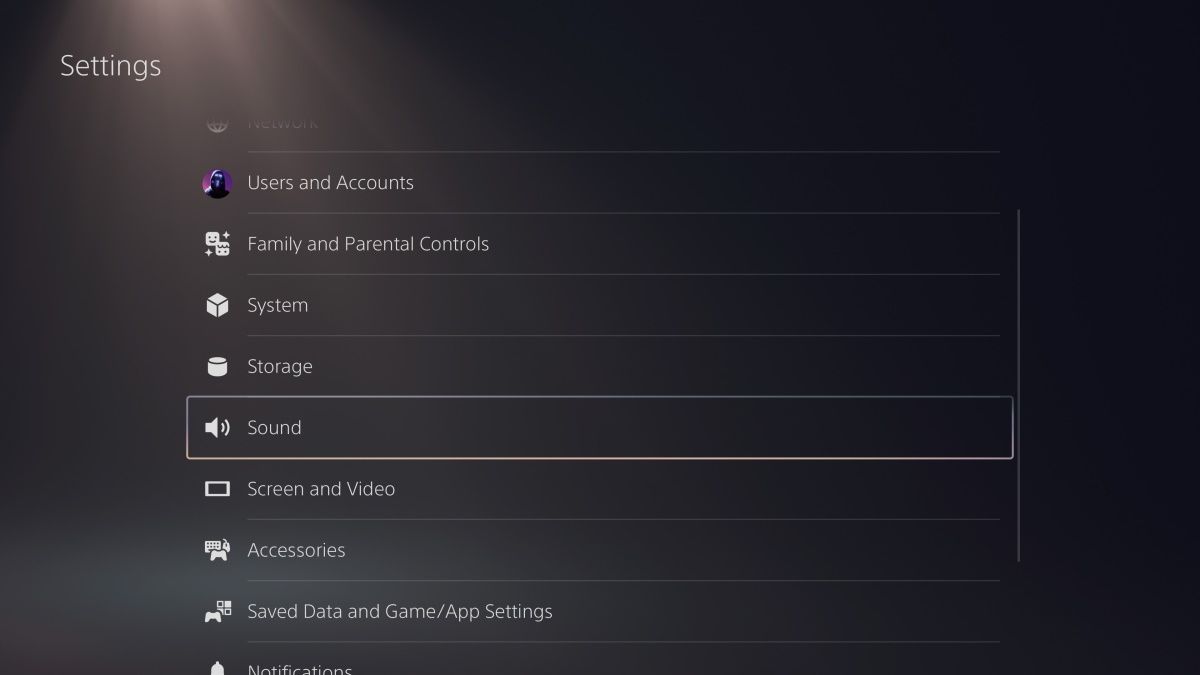
- Visit PlayStation Settings by clicking the gear icon in the top right corner of the home screen.

- Scroll down and select the Sound setting from the list of options.
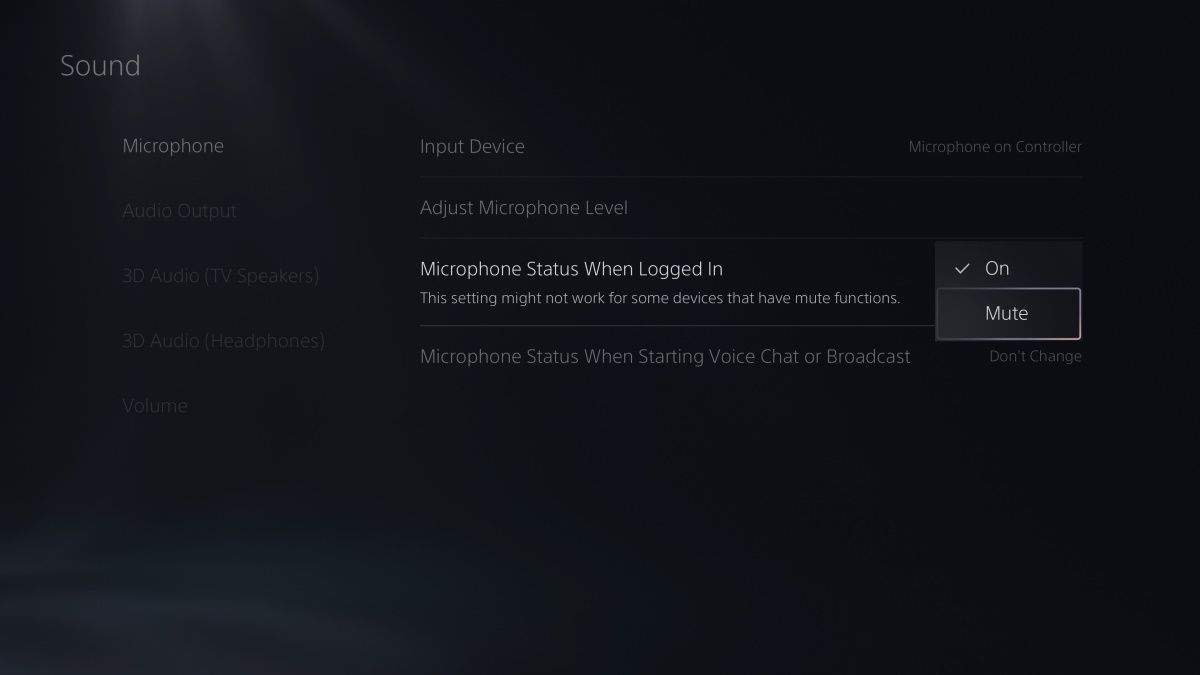
- Select Microphone > Microphone Status When Logged In, which should be set to On by default.
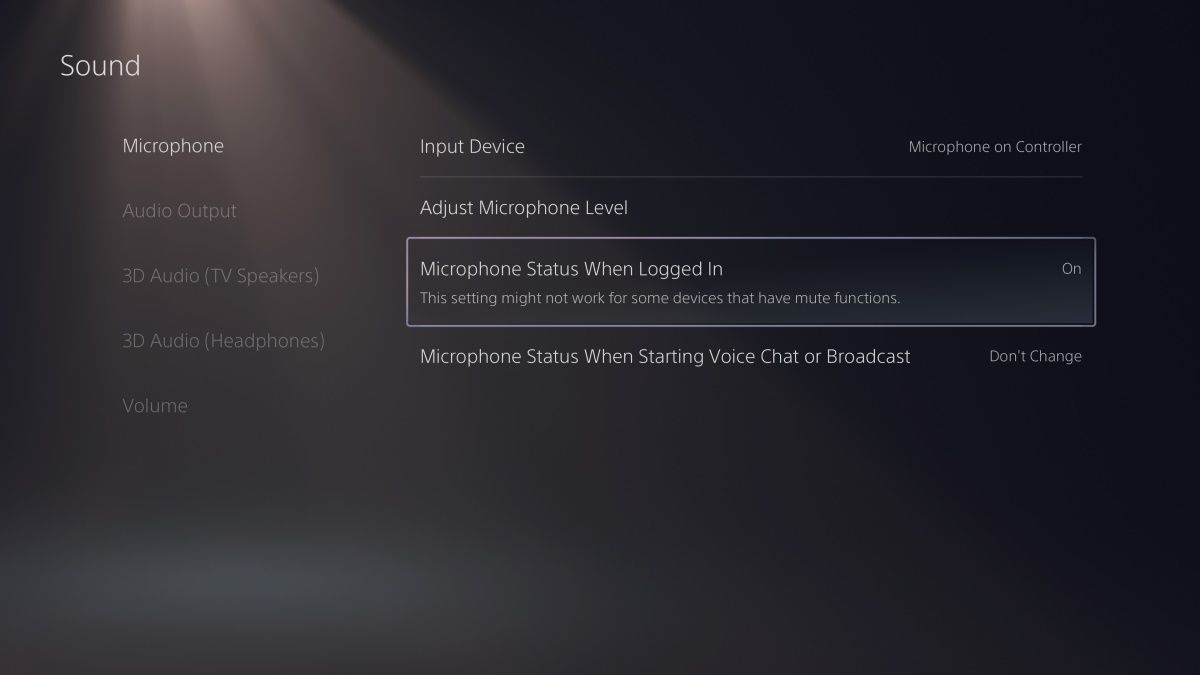
- You need to change this setting to Mute, and you are done.
This is how you can easily turn off the PlayStation 5 DualSense microphone by default. However, this change will come into effect the next time you turn on the console. You will see an Orange-coloured light just below the PS button, indicating that the microphone is mute.
FAQs
Does the PlayStation 5 DualSense Controller Come with a Built-in Microphone?
Yes, you get a built-in microphone with the PlayStation 5 DualSense controller.
How to Mute the DualSense Controller Microphone on PlayStation 5?
You can mute the DualSense controller microphone anytime by pressing the button just below the PS button. It also has a microphone icon next to it to make it easier to spot.
How do I Check if my DualSense Controller Microphone is on Mute?
The microphone button below the PS button on the DualSense controller will glow Orange if it is on mute.
How to Unmute DualSense Controller Microphone on PlayStation 5?
Press the microphone button below the PS button on the DualSense controller to unmute. The Orange light should also turn off now.