Microsoft Excel is used widely across the globe for compiling data in the best way. However, there are some times when data gets added to the sheet more than once. When you share a sheet, someone else might add the same data or this data gets duplicated when you combine a table. The process becomes more complicated and lengthy when you have to remove these duplicates one by one. The more the data, higher the chances of duplicates.
Thankfully, there are some efficient ways to remove duplicates in your excel sheet. These time saving methods don’t take up much effort. Here are re the best ways through which you can remove duplicates in an excel sheet the easy way.
Also Read: MS Excel Shortcut Keys: Best Microsoft Excel Keyboard Shortcuts for Windows and macOS Computers
Using Remove Duplicates Option on Data Tab
Microsoft Excel has a built-in tool known as ‘Data Tab’. This tool helps you to delete repeated entries in your table. Follow these steps to remove duplicates in excel sheets using the Data Tab.
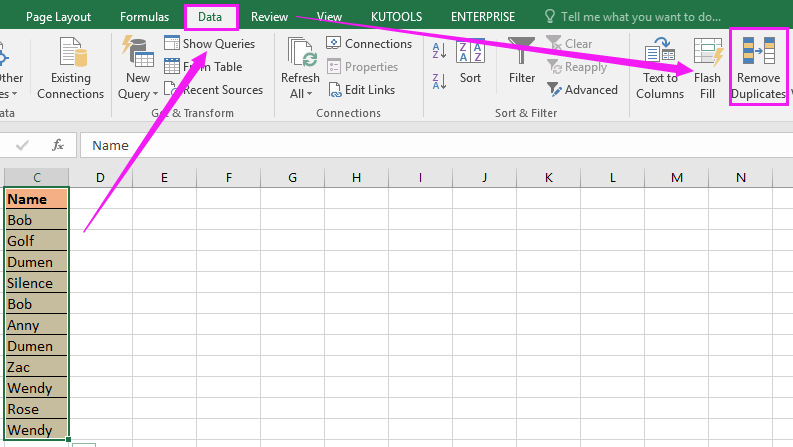
- First of all, select a cell or a specific range in which you want to remove duplicates.
- Now, go to Data Tab and in the Data Tools group, click Remove Duplicates.
- A dialogue box will appear, tick all the boxes and click Ok.
- Excel will delete the duplicates and a dialog box will appear. It will show you how many duplicates were removed from the datasheet. It will also show the count of unique values.
Using the Advanced Filter Option
Advanced Filter in Microsoft Excel allows you to filter duplicate values and copy the unique values to a separate location. Take a look at the steps you need to follow to remove duplicates using the Advanced Filter option.
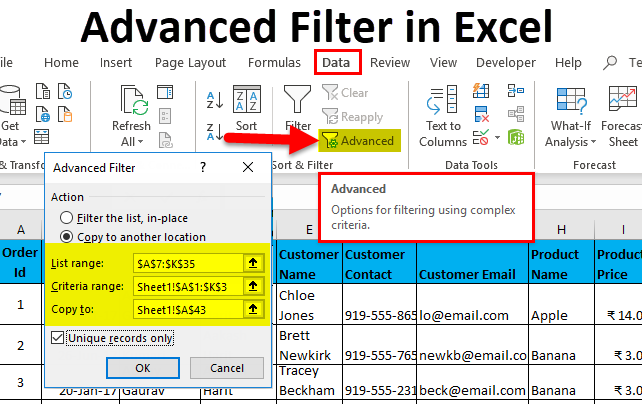
- Select a cell or range in which you want to remove duplicates.
- Now, go to Data Tab and click on the ‘Advanced Filter’ command. It will open the Advanced Filter window.
- Select the ‘Copy to another location’ to copy the unique value in your excel sheet to different locations.
- Now, select and check the ‘List Range’ option and make sure that it is the range that you have specified.
- In the ‘Copy to’ option, enter the range where you want to copy your unique values.
- Make sure to check the ‘Unique Records Only’ box and click Ok.
- The unique cells will be copied to another cell.
How to Use the Power Query Tool to Remove Duplicates in Excel?
Power Query in Microsoft Excel is a feature related to data transformation. It allows you to import data from various sources, clean and transform your data. It is one of the easiest ways to remove duplicates in an excel sheet. Follow the steps given below.

Also Read: MS Word Shortcut Keys: Full List of Keyboard Shortcuts for Windows and macOS Laptops or PCs
- Select a cell and go to Data Tab, select Get & Transform Data Section and click on From Table/Range.
- A dialog box will appear and will ask you to create a power query table. Specify the range of values and click Ok.
- The Power Query editor windows will appear. It will show you two tabs. You can remove duplicates based on either one or more columns or the entire table.
- To remove duplicates based on one or more columns, right-click on the specific column header. Use the CTRL button to remove multiple columns and remove the duplicates accordingly.
- To remove the duplicate records based on the entire table, click on the button present on the top left corner of the data preview. Now, select the ‘Remove Duplicates’ option.
- Click the ‘Close & Load’ option and the data will be loaded on to your spreadsheet.