Updates are an essential part of a device’s functionality. They keep the system up to date with the latest features and help in getting rid of bugs or performance issues. But some Windows OS users might not agree to this.
In Windows 10 and Windows 11, cumulative updates are installed automatically. However, many users want to turn off Windows 10 automatic updates. There have been far too many instances where Windows 10 updates have actually brought in issues instead of mending them.
If you are someone who is annoyed with the Windows updates, here we will tell you how you can disable the auto-update in Windows 10 and Windows 11. Before we move forward, it is important to note that all the screenshots used in this article are taken from a Windows 10 machine. However, the same process will be also valid for the Windows 11 operating system.
How to Turn Off Automatic Updates in Windows 10 and Windows 11
Microsoft makes it a little difficult to turn off automatic updates in Windows 10. Although you can disable the Windows 10 automatic update temporarily, disabling them permanently requires doing some heavy lifting. This is the same for Windows 11 as well.
Below we will discuss all the ways through which you can disable automatic updates in Windows 10 and Windows 11.
How to Disable Automatic Updates in Windows 11 and Windows 10 by Pausing Auto Updates
Pausing updates is one of the easiest and fastest methods to stop automatic updates in Windows 10 and Windows 11. However, as the name suggests, the settings will only pause the updates temporarily. So, if you want to pause automatic updates in Windows 11 or Windows 10, follow these steps:
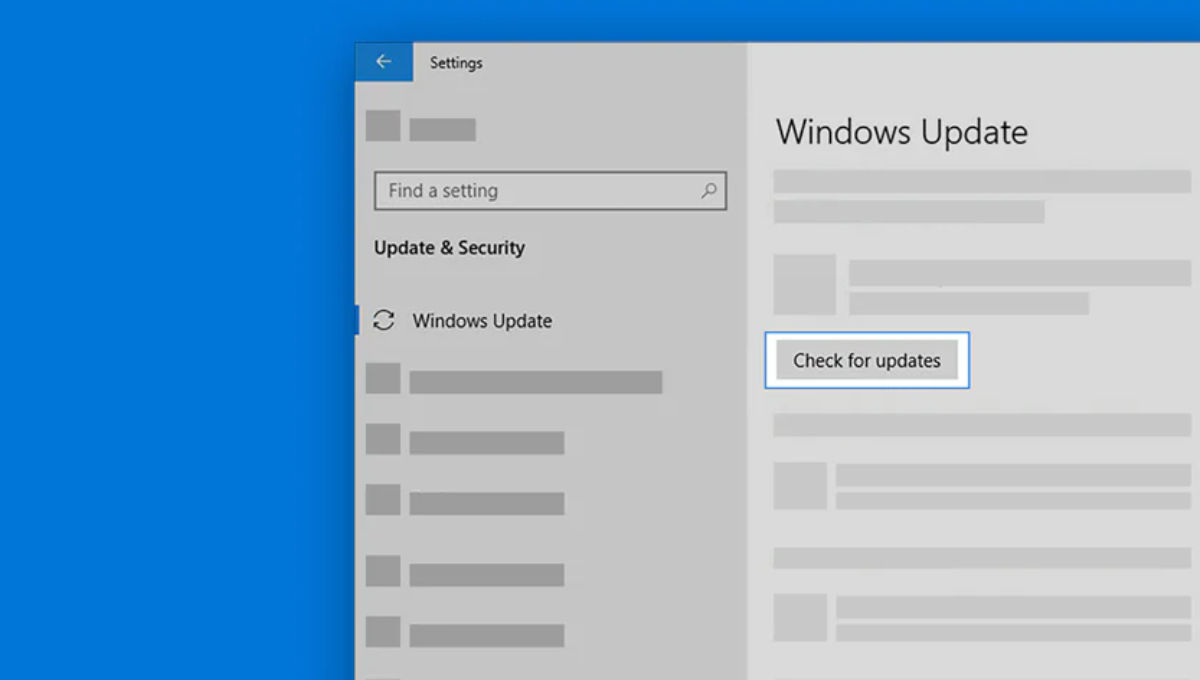
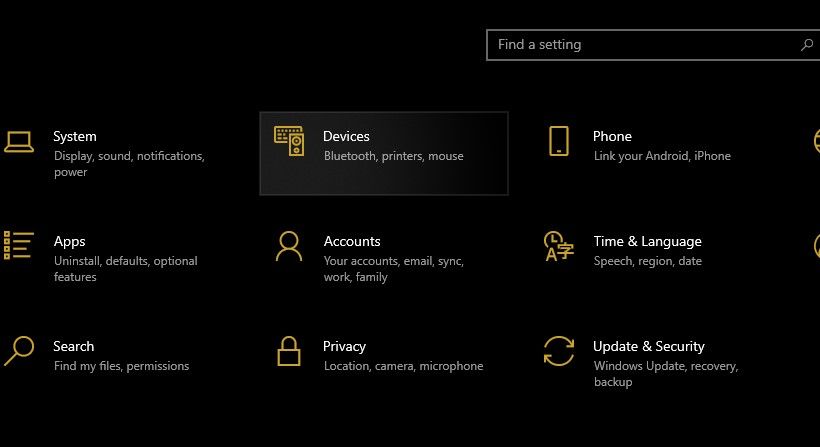
1. Go to Start > Settings > Update and Security.
2. Click on Pause updates for 7 days.
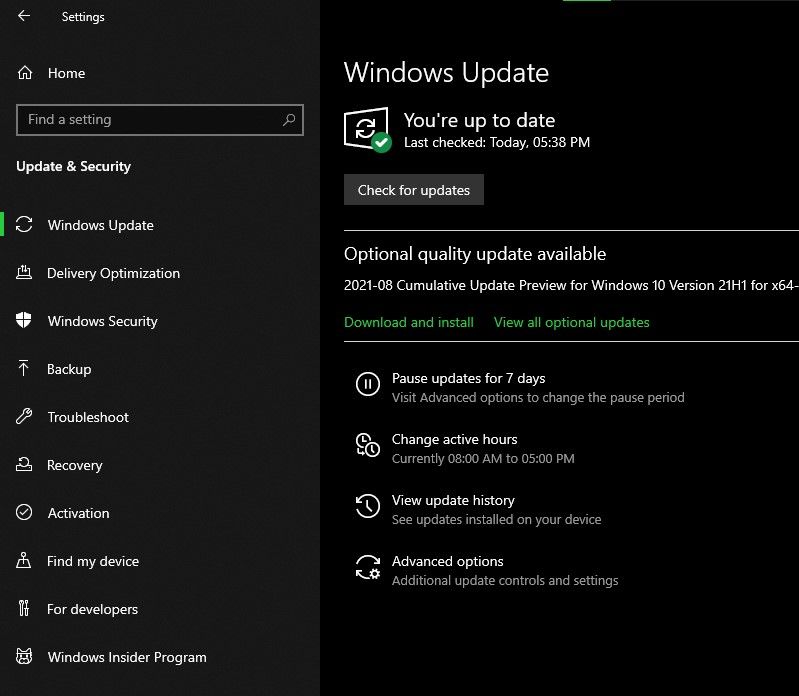
3. Click on Advanced options on the same page to change the pause period.
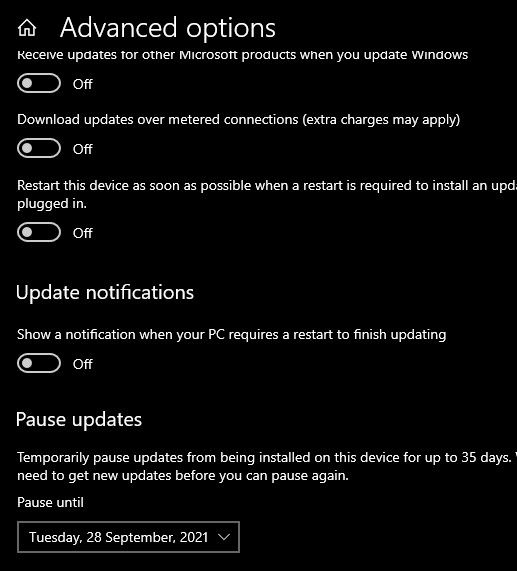
4. Under the Pause updates section, click on Select date.
5. Select the date in the drop-down menu.
Using this method, you can pause the updates for up to 35 days. Once the pause period is over, Windows will automatically install new updates before you can use the option again.
Pausing automatic updates in Windows 10 and Windows 11 can be useful in several situations. If you have a potato PC, doing this can free up your memory. Also, you don’t want updates running when you are playing a heavy PC game.
How to Disable Automatic Updates in Windows 11 and Windows 10 via Update Services
If you want to turn off Windows 10 and Windows 11 automatic updates permanently, disabling the entire Windows update service is one way to go about it.
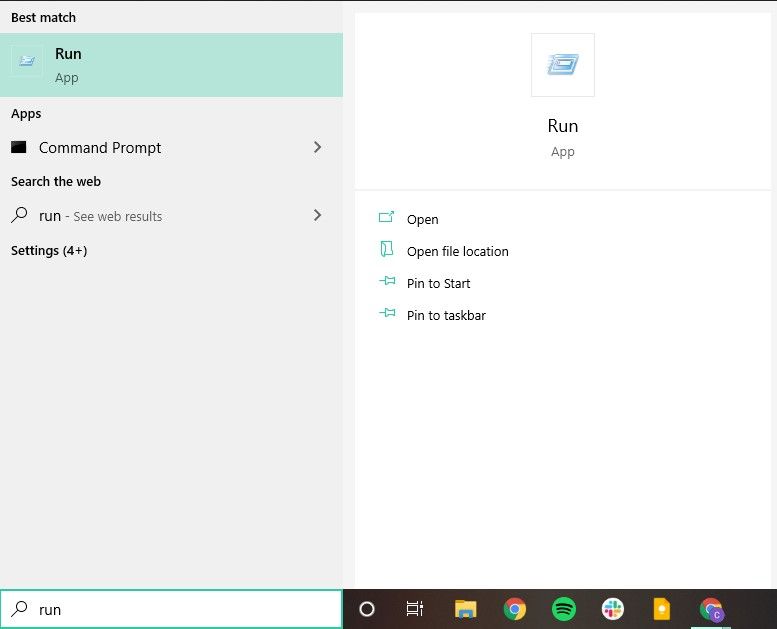
1. To do this, go to Start and type Run.
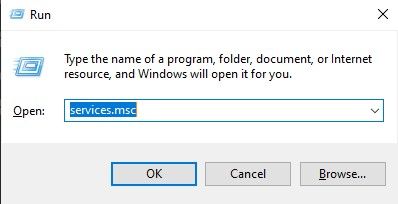
2. Open the Run utility and enter the following, “services.msc”. Press Enter. (Alternatively, you can use the shortcut Win+R to open the Run box)
3. In the service window, look for Windows Update and double click on it.
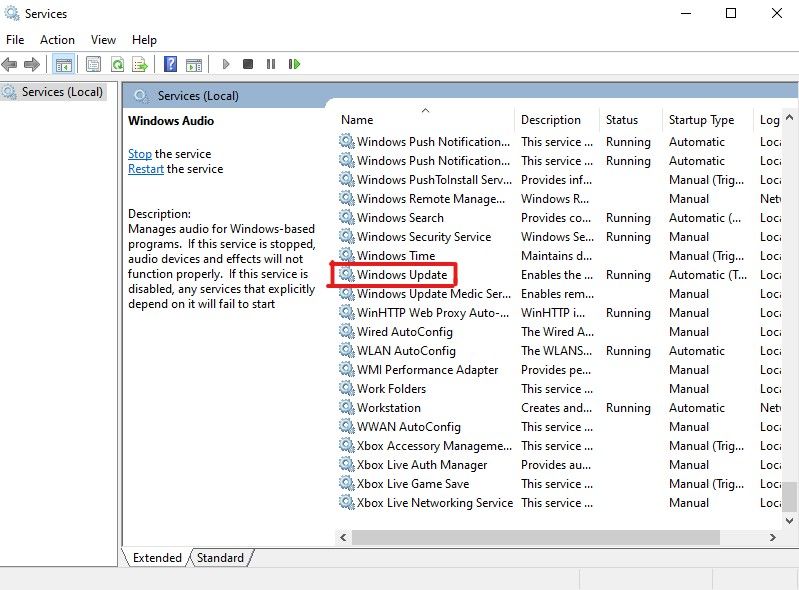
4. In the Windows update settings, select Disabled from the drop-down menu beside Startup Type.
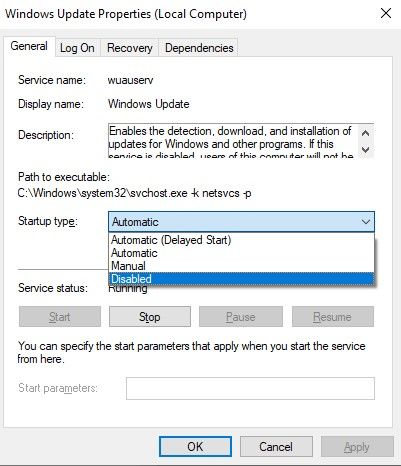
5. Now, click on OK and restart the PC to put the changes into effect.
Your PC will no longer update your system automatically. If you want to undo this change, simply return to the Windows update settings and select Enabled in the drop-down menu.
How to Stop Automatic Updates in Windows 11 and Windows 10 via Registry
Modifying the registry is another method to stop automatic updates in Windows 10 and Windows 11.
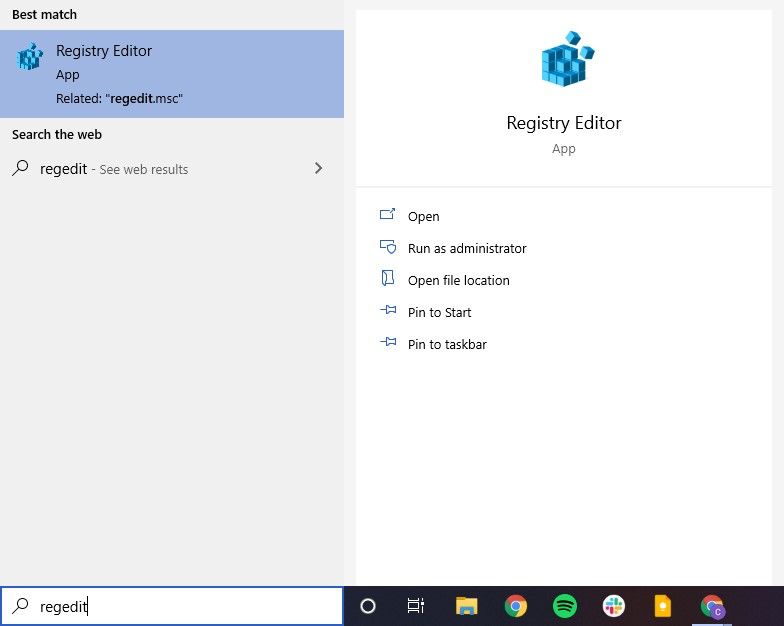
1. To do this, go to Start and type regedit. Click on the Registry Editor in the search results.
2. Copy the following path in the Registry Editor’s address bar and press Enter.
HKEY_LOCAL_MACHINE\SOFTWARE\Policies\Microsoft\Windows
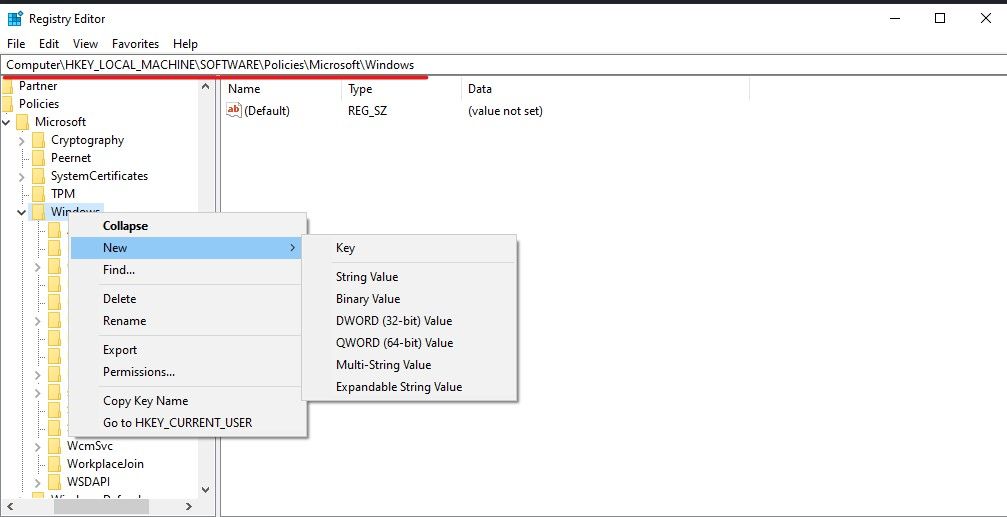
3. Right-click on the Windows folder in the sidebar
4. Select New > Key. Name it WindowsUpdate and press Enter.
5. Now, right click on WindowsUpdate and again create a new key. Name it AU and press Enter.
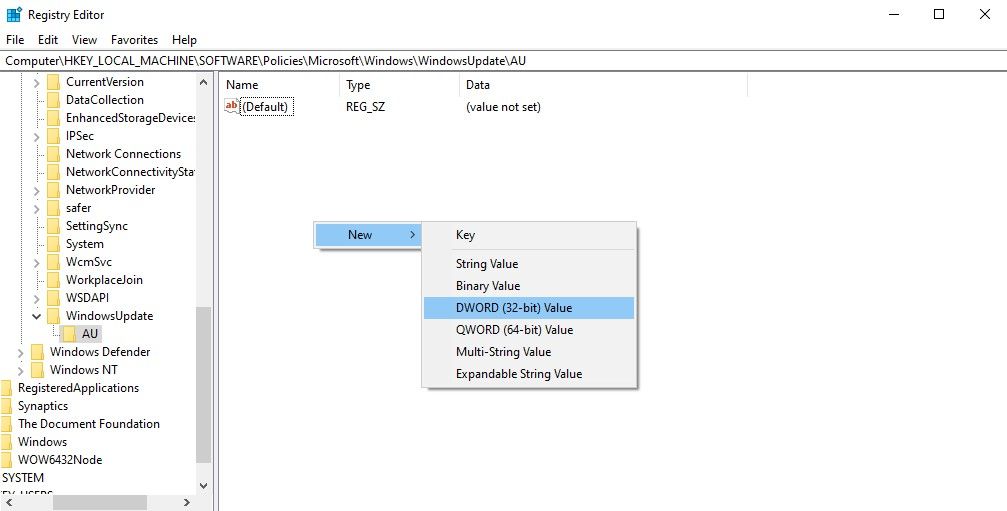
6. Right click anywhere on the right panel and select New > DWORD (32-bit) Value.
7. Name the key NoAutoUpdate and press Enter.
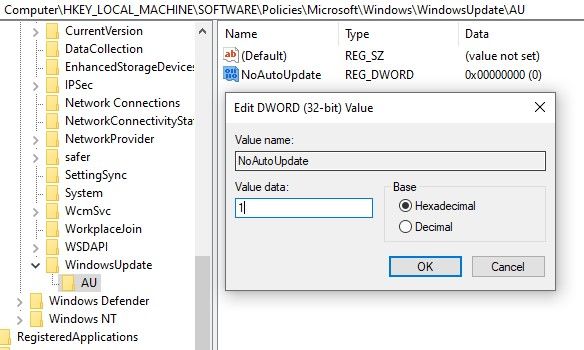
8. Double click on it and change the value from 0 to 1.
9. Close the Registry Editor and restart your PC.
You have now permanently disabled the Windows 10/Windows 11 ability to perform automatic updates. Also, you can avtivate Windows 10 free – Read More. The Check for updates option in the Windows update settings will still be available.
How to Disable Automatic Updates in Windows 11 and Windows 10 via Group Policy
If you are running Windows 10 Pro or Windows 11 Pro, you have the option to turn off automatic updates using the Group policy editor. Here is what you need to do.
- Go to Start and type gpedit.msc. Click on the Group policy editor in the search results.
- Go to the following path – Computer Configuration > Administrative Templates > Windows Components > Windows Update
- Double-click on Configure Automatic Updates
- Select Disabled in the new dialog box.
- Click on Ok.
You have stopped Windows 10 from downloading or installing updates automatically. But once again, you can check for updates in the Windows Update settings.
How to Disable Automatic Updates in Windows 11 and Windows 10 via Windows Update Block Utility Application
If you don’t want to go through the trouble of editing the Registry Editor or the Group Policy, you can alternatively install Windows Update Blocker that can turn off automatic updates in just a few steps.
Simply install Windows Update Blocker from here and follow the instructions below.
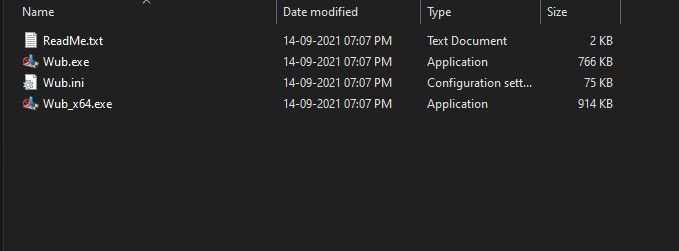
1. Extract the Windows Update Blocker file.
2. Open the exe file and select Disable updates.
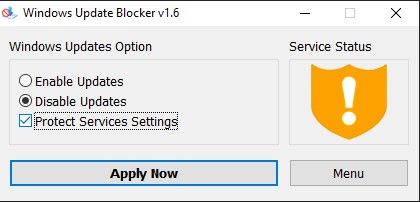
3. Check Protect Services Settings and click on Apply Now.
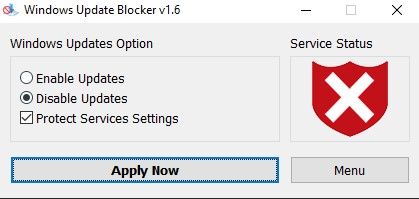
If the icon under Service status turns red, it means you have successfully turned off automatic updates in Windows 10 and Windows 11.
How to Disable Automatic Updates in Windows 11 and Windows 10 via Metered Connection
A temporary solution to stop automatic updates in Windows 10 and Windows 11 is to set up a metered connection. You will essentially be putting a manual data cap on your internet connection. Thus, blocking Windows from downloading big updates.
To set up a metered connection, here is what you need to do.
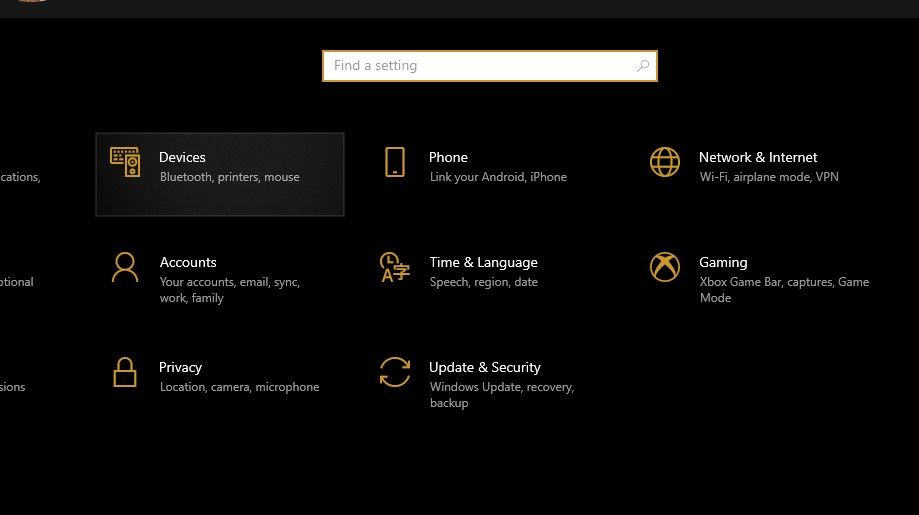
1. Go to Start > Settings > Network and Internet.
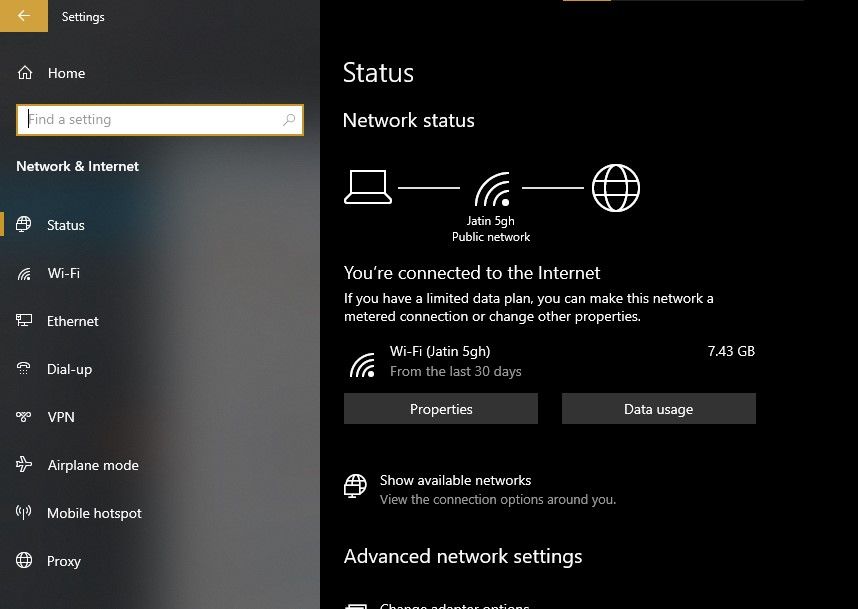
2. Select Data Usage under the Status settings.
3. Click on Enter limit.
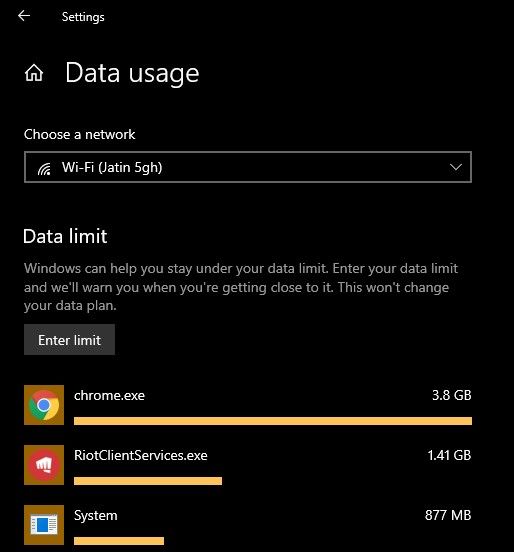
4. Select the amount of MB you want to allow.
A metered network to stop Windows 10 and Windows 11 automatic updates might not be feasible for every situation. That’s because the data limit applies to your entire PC, and not just the Windows update. You may have to remove the data cap it once again if you plan to download some
These were some of the ways through which you can stop automatic updates in Windows 10 and Windows 11. A few methods include editing the Registry and the Group policy. Therefore, make sure to follow the steps carefully in order to avoid creating any unwanted issues. Having a backup of your important files would be a wise option.