Taking screenshots is an important task in the everyday workflow of not only students but also professionals. You can see what’s shown on the screen of the device as a JPG or PNG image, and this functionality is available in Windows laptops/PCs and Macs. However, the steps involved in capturing screenshots are different for Windows and MacOS platforms.
In this article, we talk about all the methods for taking a screenshot on Windows and MacOS devices.
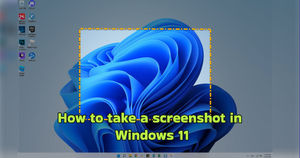
How To Take Screenshots on Windows?
The process of taking screenshots easily on Windows PCs, including desktops and laptops by the likes of Dell, HP, Asus, Lenovo, Acer and others, used to be cumbersome and not seamless. However, all of this has recently changed, and your Windows 10 or Windows 11 PC has a seamless way to record screenshots and save them to your PC drive. Thankfully, irrespective of whether you are using a Dell laptop, an HP laptop or a Lenovo work desktop, the process of taking a screenshot remains the same.
How To Take Full Screenshot on Windows 11 or Windows 10 (Auto-Save)?
Here’s how to take a screenshot on a Windows 11 or Windows 10 PC very easily:
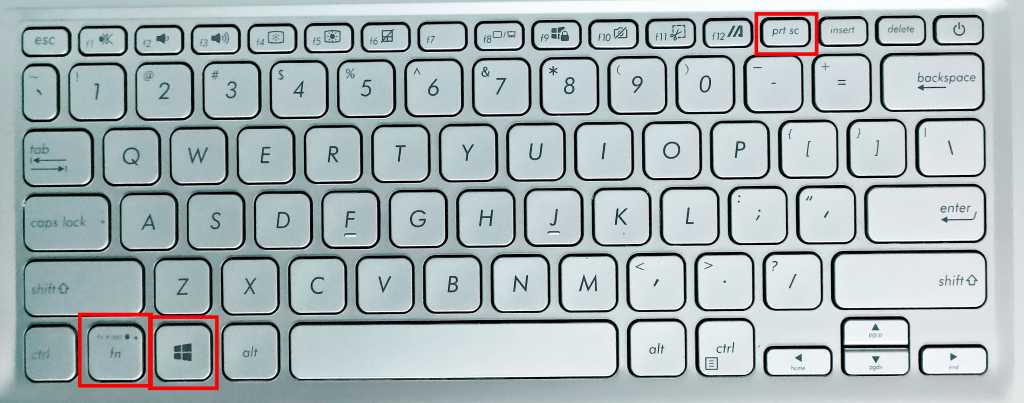
- On your Windows PC, click the Windows Logo key + PrtScn key.
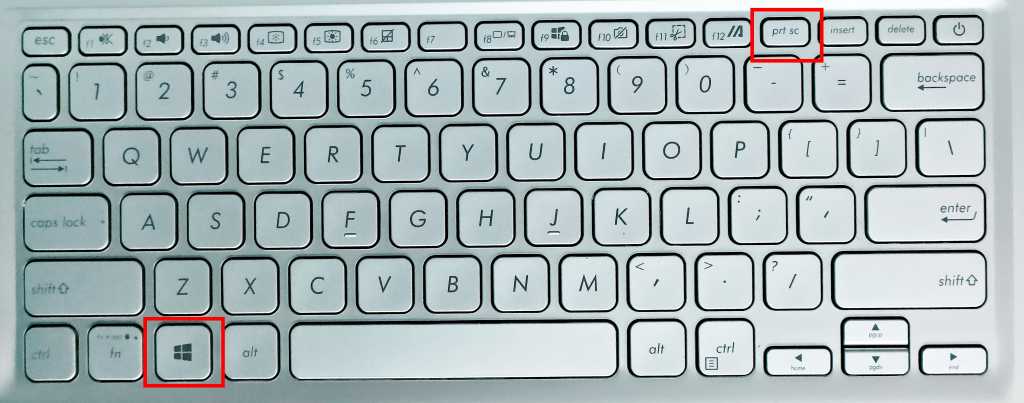
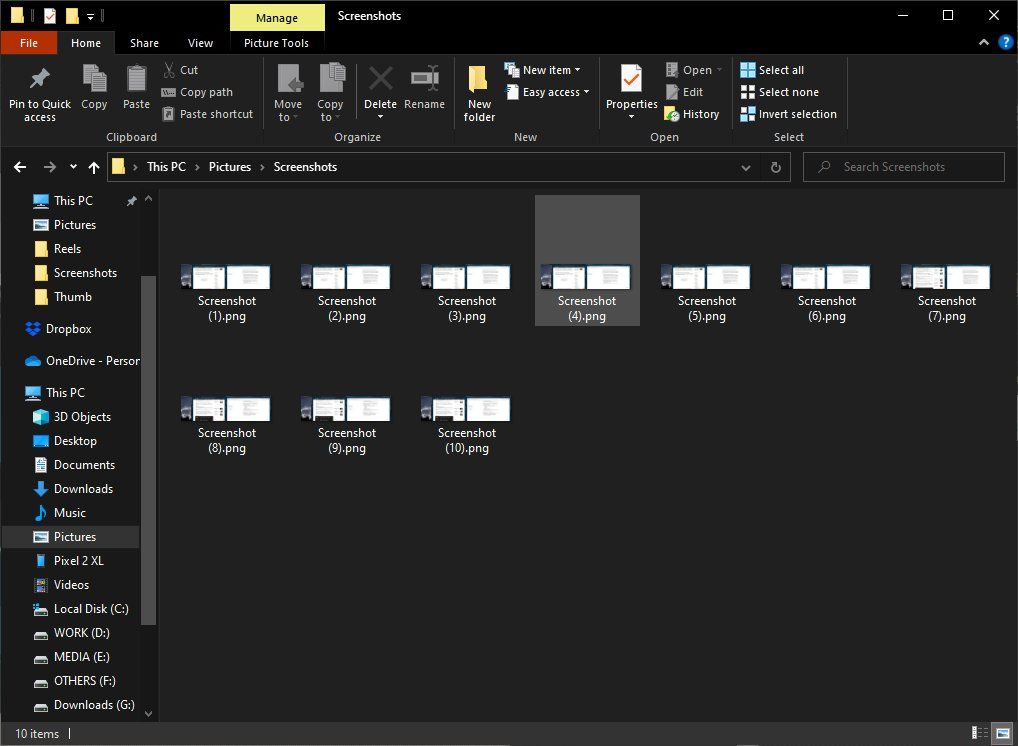
- The screenshot will be saved to the Screenshots folder in the Pictures folder on your Windows PC as a PNG image.
NOTE: In some laptops, you might need to press the Function (Fn) key to enable the PrtScn button so that the shortcut will be – Fn key + Windows Logo key + PrtScn key.
How To Take Full Screenshot on Windows 11 or 10 (Copy To Clipboard)?
If you don’t want the screenshot to be saved to the folder but want just to copy it to be pasted on a different app, you can just click the PrtScr button.
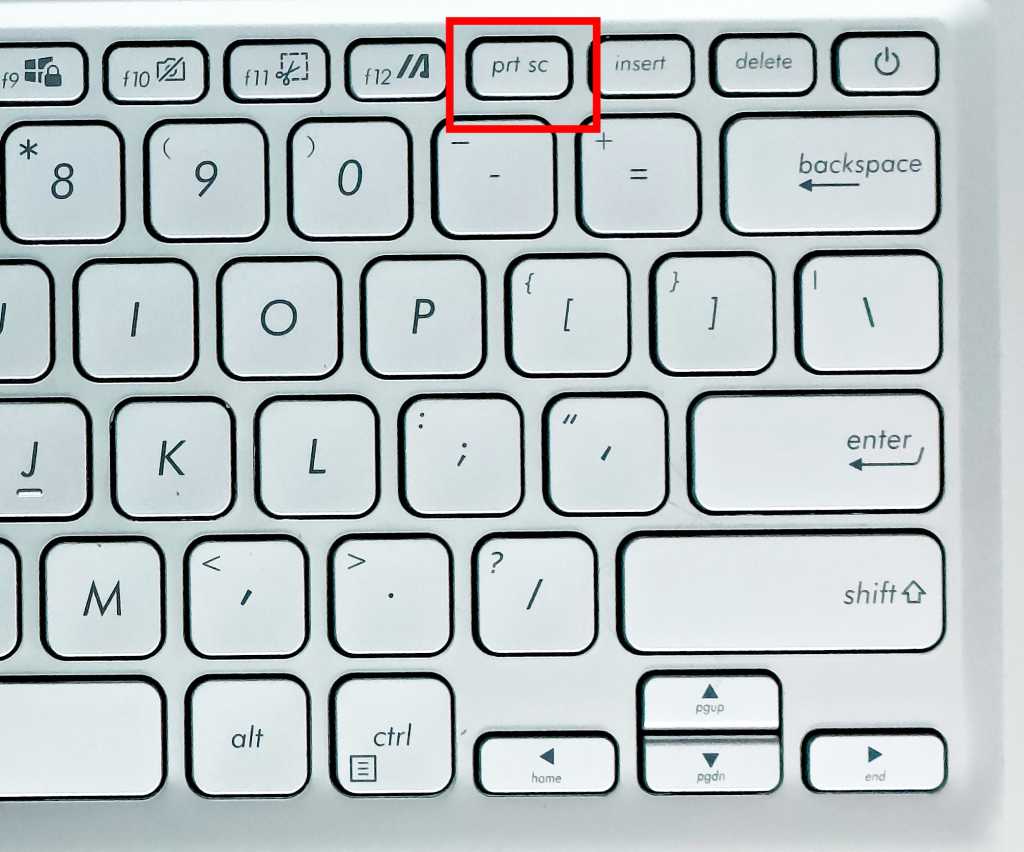
It will not save the screenshot but only copies the image on the clipboard. You will not be notified of the screenshot being taken, but it will be available to paste into the clipboard. After editing, you can save that screenshot using any other app like Paint, Photoshop or Photoscape.
How To Take A Screenshot of a Window on Windows 11 or Windows 10 (Auto-Save)?
Here’s how to use the Windows Games bar to take a screenshot of an active Window in Windows 10 or Windows 11. This option will save the screenshot automatically after clicking the shortcut. Here’s how to do that:
- On your Windows PC, move the cursor to the window you want to screenshot.
- Press the Windows key + Alt key + PrtScn key.
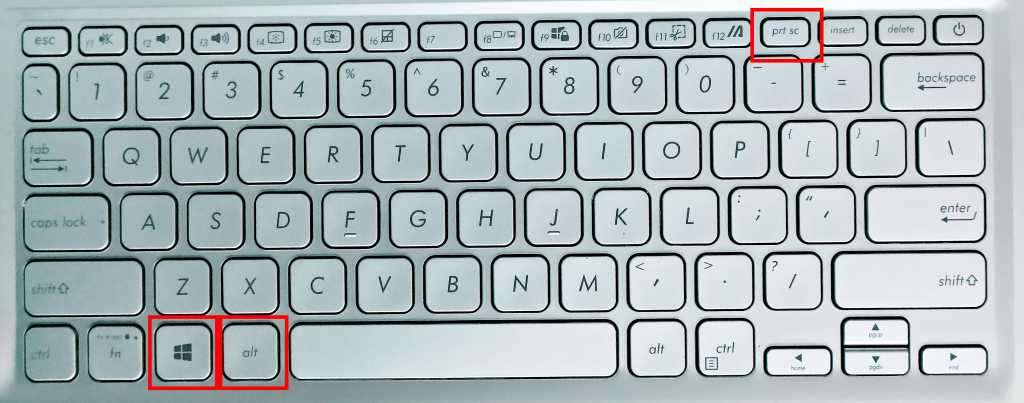
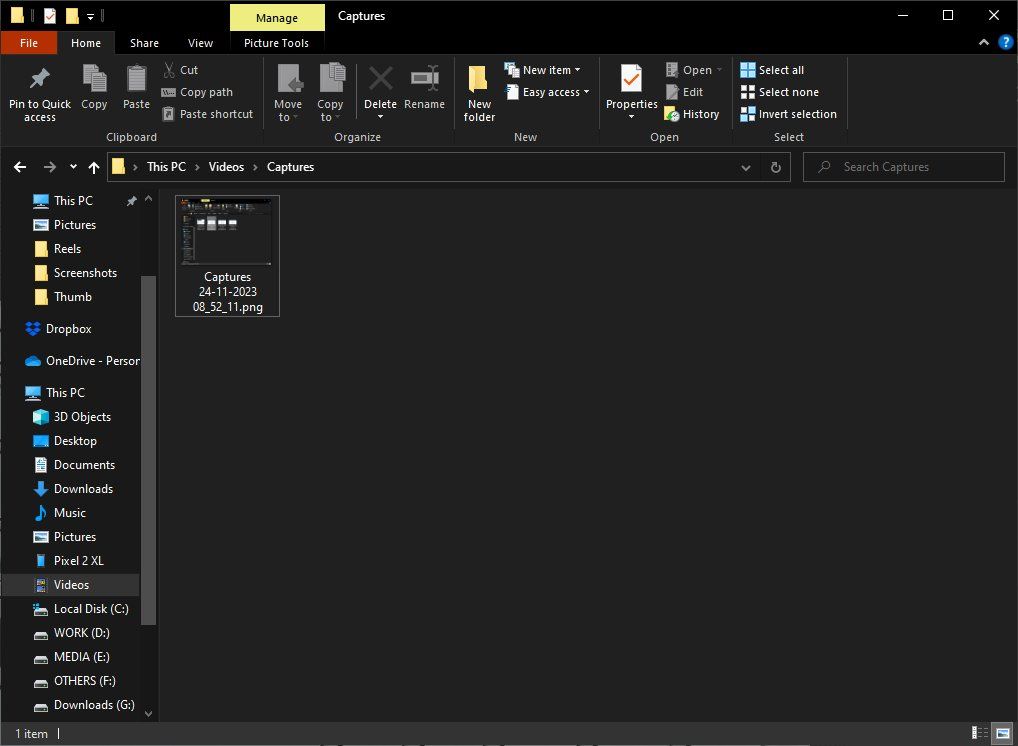
- The screenshot of the window where your cursor is will be saved to the Captures folder on your Windows laptop. The Captures folder is located under the Videos folder on your PC.
How To Take A Screenshot on Windows 7/10/11 using the Snipping Tool?
The Snipping Tool on Windows will let you capture screenshots of not only the full screen, but also selected Window, but also partial screenshots.
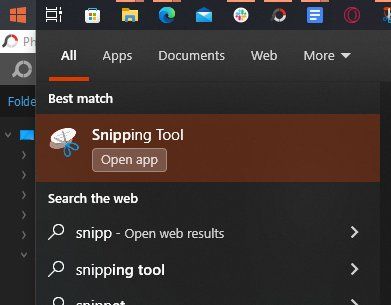
- On Windows, go to the Start menu and search for Snipping Tool.
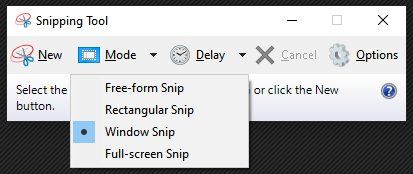
- Once the tool opens, click on New. Before clicking, make sure that you are on the window in which you want to take a screenshot.
- Select the Mode using the Mode button, you can select from these modes:
- Free-form snip
- Rectangular snip
- Windows snip
- Full-screen snip
- Click on New, this opens up a selection window.
- Use your mouse pointer to select the part of the display that you wish to capture, if you selected the free-form or rectangular snip option.
- This will open a new window with the captured part.
- Use Ctrl + S to save the screenshot, select the folder where you want to save the file and click Save.
How To Take Screenshots Using Snip Shortcut?
You can use a shortcut to open the other version of the Snipping Tool – the Snip & Sketch in Windows 10 and 11. Here’s how to access it:
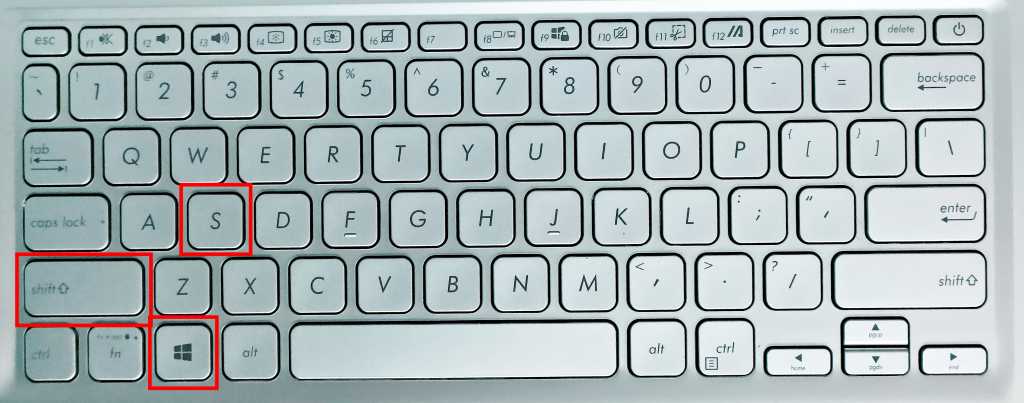
- On Windows 10 and 11, use this shortcut: Windows key + Shift key + S key.
- Select from Rectangular Snip, Freeform Snip, Window Snip and Fullscreen Snip.
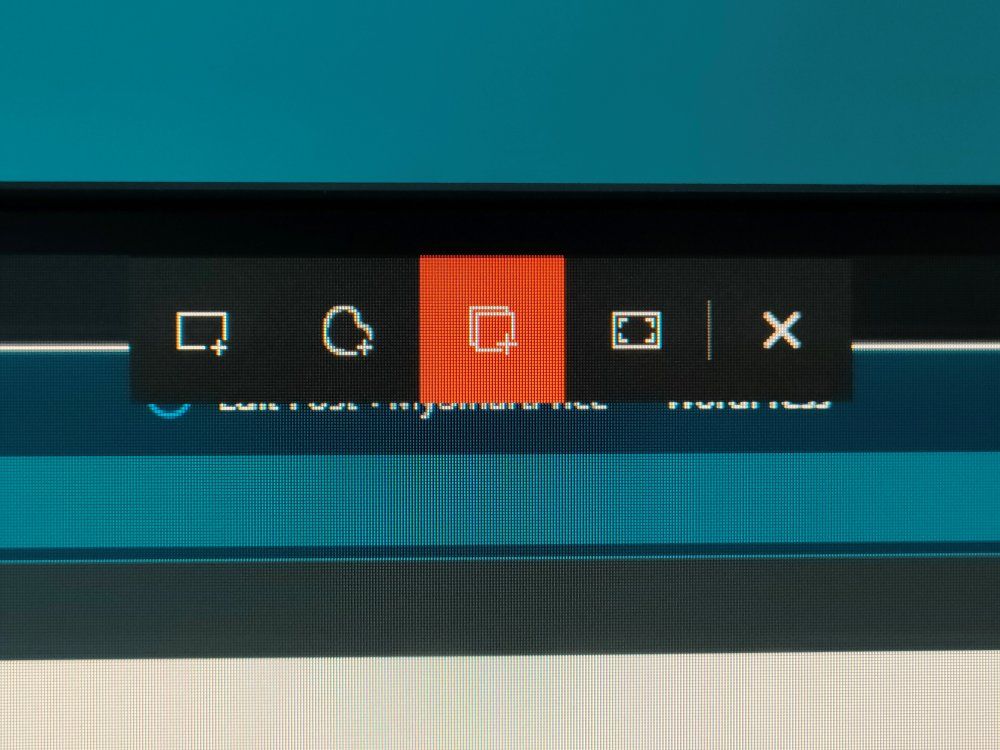
- You can use the mouse pointer to select the part of the screen to be captured.
- Click on the notification you get after screenshotting to open the Snip & Sketch tool.
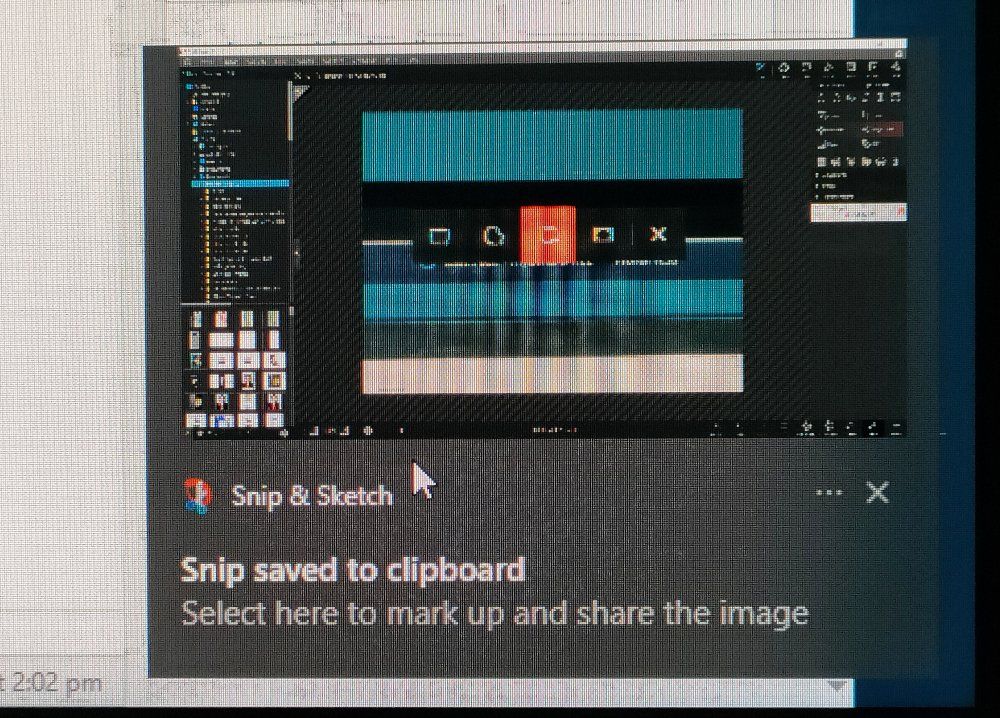
- You can edit or save the screenshot from this tool.

Assign Snipping Tool to PrtScn
You can assign the Print Screen button to open the Snip & Sketch tool on Windows. This would make the screenshotting process easier by opening the snipping tool without needing to press the three key combos mentioned in the last section. Here’s how to do this:
- Search for Use the Print Screen button to open screen snipping on the Start menu.
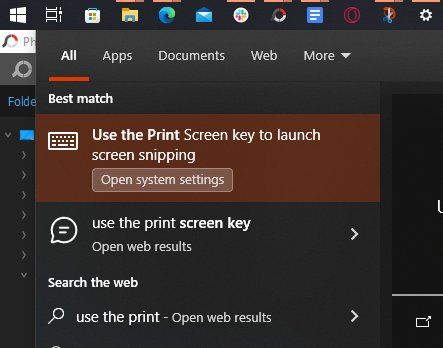
- Tap on the search result to open System Settings.
- Tap the toggle switch to On to assign the PrtScn key to screen snipping.
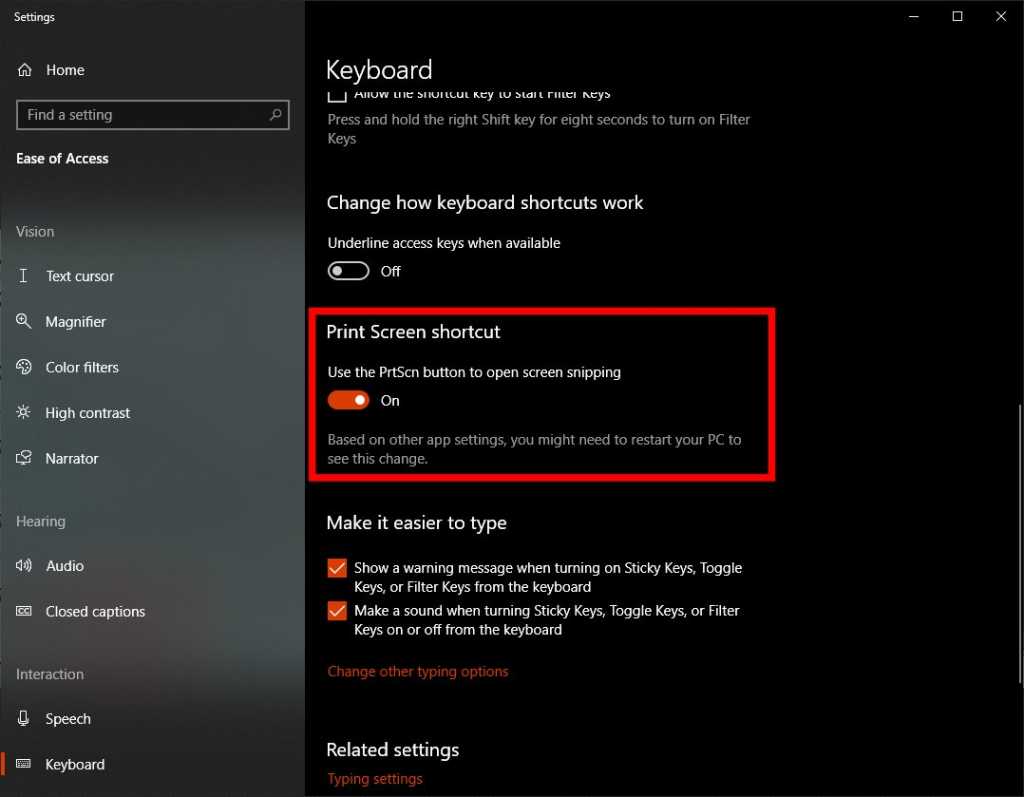
- From now on, the PrtScn button will open the snipping tool. You can proceed like the last section to take a screenshot.
Also Read: How to Take Screenshots on Android Mobiles: OnePlus, Samsung, Vivo, OPPO, Realme, Xiaomi, Redmi
How To Take Screenshots on MacOS?
Taking a screenshot on macOS has typically always been a more seamless affair than doing the same on a Windows PC. With Apple offering a far more unified ecosystem in terms of both software and hardware, the process of taking a screenshot has remained consistent and constant through many generations of MacBook.
Taking screenshots on MacOS is achieved by using various shortcuts. Each shortcut is used to take different styles of screenshots. Here are the various shortcuts for taking screenshots on MacOS:
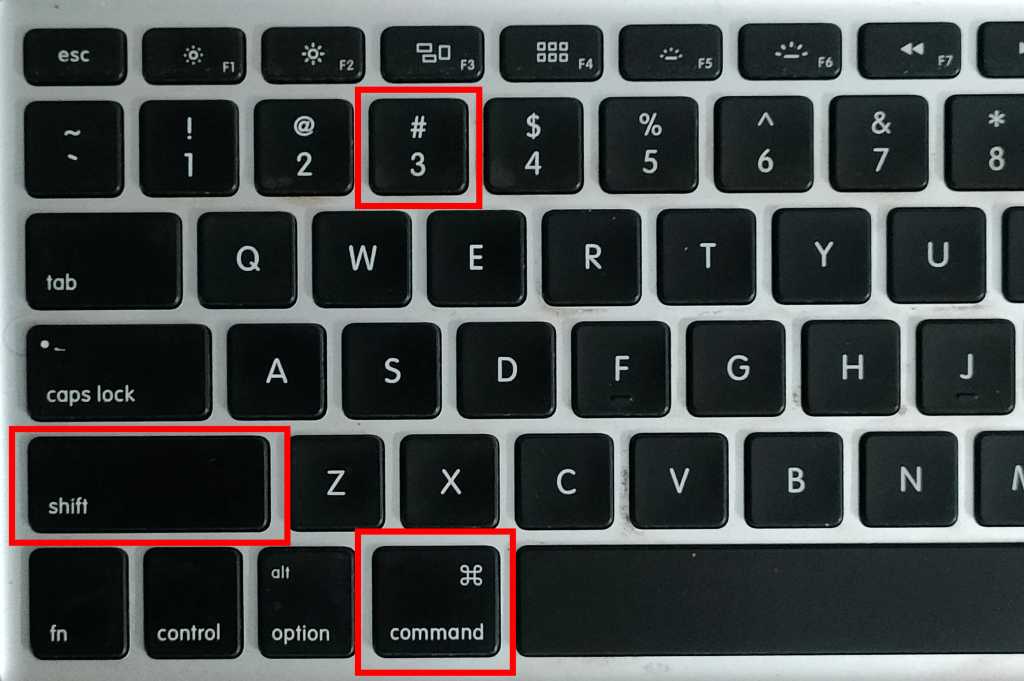
Full Screenshot – Cmd + Shift + 3
This shortcut will take a full screenshot of the screen. Here’s how to do that:
- On MacOS, press and hold: Cmd key + Shift key + 3.
- You’ll see the thumbnail of the screenshot in the corner of your screen. Click on that to edit the screenshot.
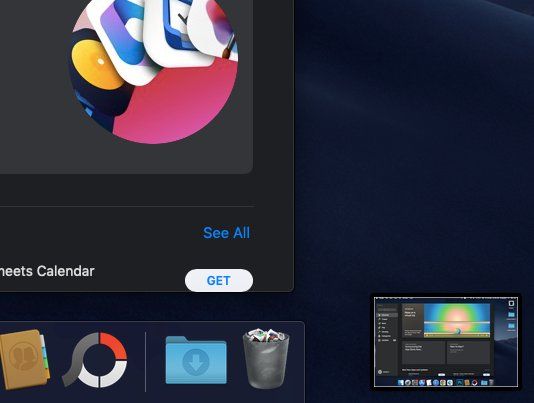
- Or you can wait for the screenshot to be saved to the desktop.
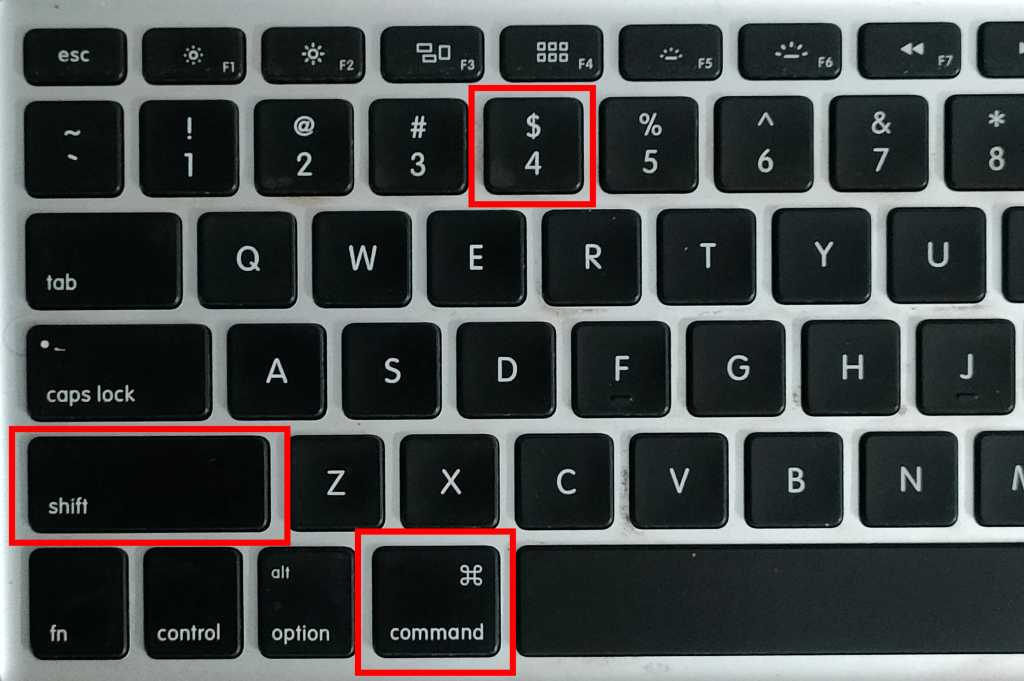
Partial Screenshot – Cmd + Shift + 4
This shortcut will take a partial screenshot in MacOS. Here’s how to do it:
- On MacOS, press and hold: Cmd key + Shift key + 4.
- A crosshair will appear on the screen. Drag the crosshair to select the area to capture the screenshot.

- To change the selection and reposition it, press and hold the Space bar while dragging.
- You can cancel the screenshot by clicking on the Esc key.
- To save the screenshot, you can release the mouse or trackpad.
- You can wait for the screenshot to be saved to the desktop or edit the screenshot by clicking on the thumbnail of the screenshot on the corner of your screen.
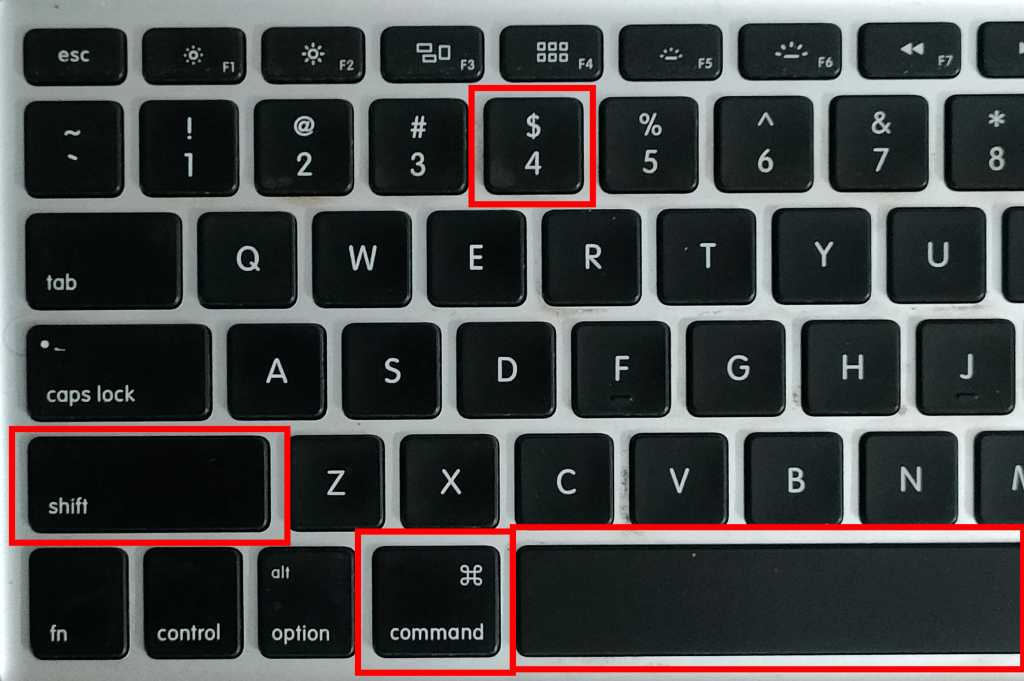
Capture A Window – Cmd + Shift + 4 + Space Bar
To capture a screenshot of a windows, use this:
- On MacOS open the window you want to capture, press and hold: Cmd key + Shift key + 4 + Space Bar (in this order).
- The mouse pointer will change to the camera icon.
- Click on the window to capture it.
- You can wait for the screenshot to be saved to the desktop or click on the thumbnail in the corner to edit it.
Screenshot Tool – Cmd + Shift + 5
With this shortcut, you can have a free handover of capturing a screenshot. Here’s how to do that:
- On MacOS, press and hold the Cmd key + Shift key + 5.
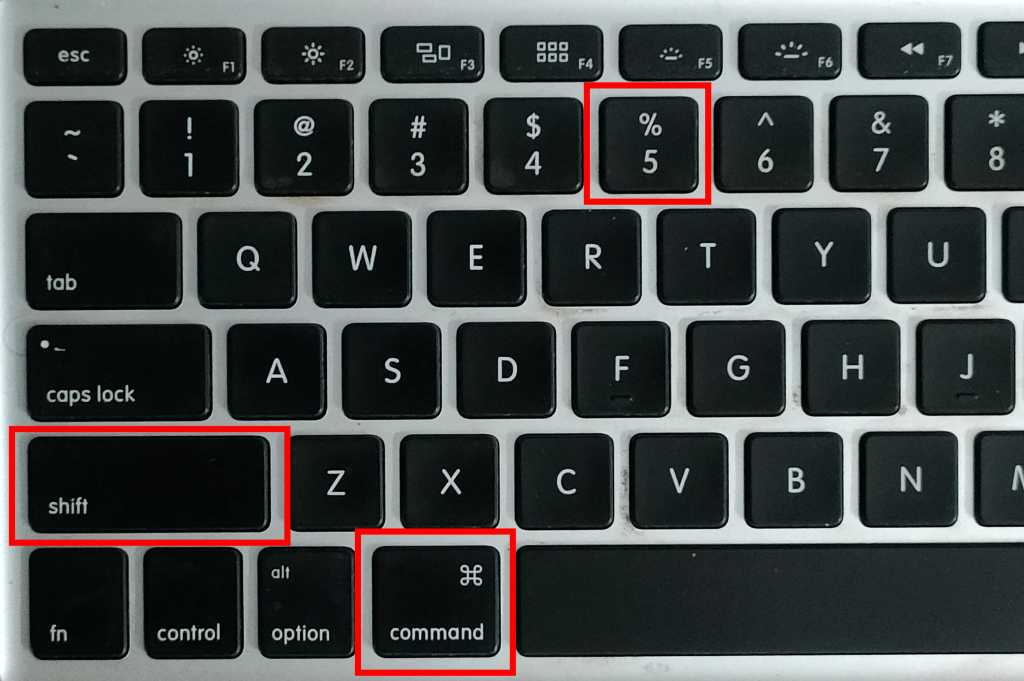
- This will open the screenshot tool in MacOS. You can select from these options:
- Capture Entire Screen – to capture the entire screen.
- Capture Selected Window – to capture the selected window.
- Capture Selected Portion – to capture the portion you select.
After selecting the option, click on the Capture button to take the screenshot.