Google Assistant is hardly a new service, but is one that has steadily grown in repute. While it has faced its share of privacy controversies so far, it is undoubtedly one of the most well heeled services in terms of accuracy of search results and the convenience of voice interaction to boot. If you have also been enamoured by the convenience of Google Assistant services on Android phones, you’d be pleased to note that there are easy, streamlined ways for you to get the Google Assistant working on your Windows 10 and macOS PCs, too. Here’s looking at the ways in which you can get the Google AI voice assistant to be your working aid on your laptops and desktops as well.
Also Read: Google Reverse Image Search: How to Search Google by Image on Android Mobile, iPhone and Laptop
How to Install Google Assistant on Windows 10 Laptop or PC
Before we begin, it’s important to note that contrary to expectations, it is Google Assistant on Windows 10 PCs (both laptops and desktops) that is a bit tricky to install. While the process is not exactly complicated per se, but is slightly on the complex end of things. As a result, make sure that you read through each instruction carefully — particularly if you are not a tech savvy user. Also note that Google Assistant is not available as an official service on Windows 10, so you’ll be relying on unofficial file downloads — so proceed at your very own risk.
- You begin by heading to the Google Actions Console home page. If you aren’t signed in to Google already, do so at the very first step.
- Once signed in, you’ll see a ‘New project’ button. Click on it to get started. Accept the prompted terms to proceed.
- You’ll be asked to name your project here. You can set any name you please.
- Once the project page opens, scroll or find an option that says, ‘Are you looking for device registration?’ Click on the ‘click here’ button to proceed.
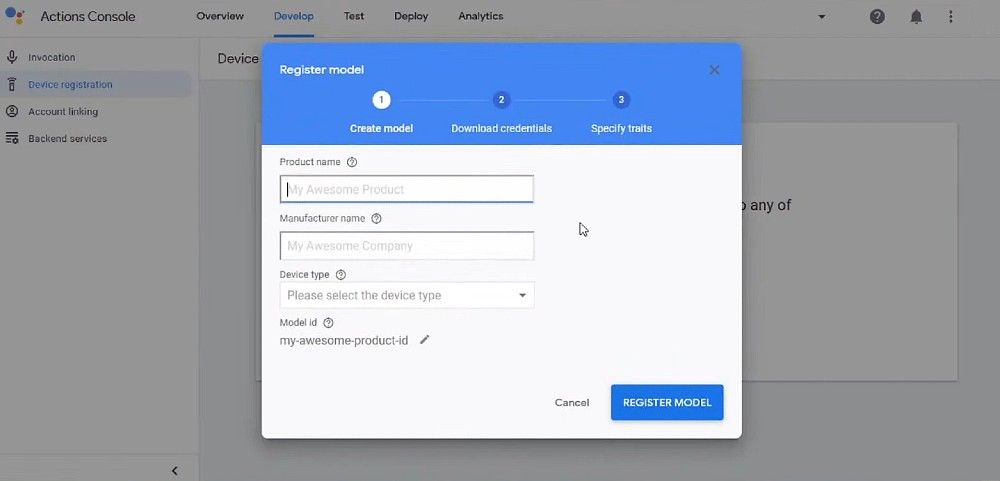
- Here, you’ll be asked to ‘Register model’ to register your device. Put anything you please in the product and manufacturer name fields, and select any product category and proceed.
- In the next step called ‘Download credentials’, click on ‘Download OAuth 2.0 credentials’. This will download a JSON file to your PC. Keep it somewhere handy.
- Next, go to the Google Cloud Platform console, and from the top left of the page, click on ‘Select a project’.
- Here, select ‘All’ to find your project and open it. Once open, find the ‘APIs and services’ option to the slide-out left hand menu. Click on it.
- Here, click on ‘Enable APIs and services’ from the top row, find and select the Google Assistant API, and enable it.
- Once it is enable, a new page opens. Here, go to ‘Credentials’ tab on the left, and from the page that opens, select ‘Configure consent screen’. On the next page, select user type ‘External’ and click on create.
- On the same screen, then choose your email address, scroll to bottom, add your email ID to developer contact, and click on ‘Save and continue’.
- Once done, click on ‘Back to dashboard’. Here, scroll down to find the ‘Test users’ field, and click on ‘Add user’. Select your email ID again, and save it.
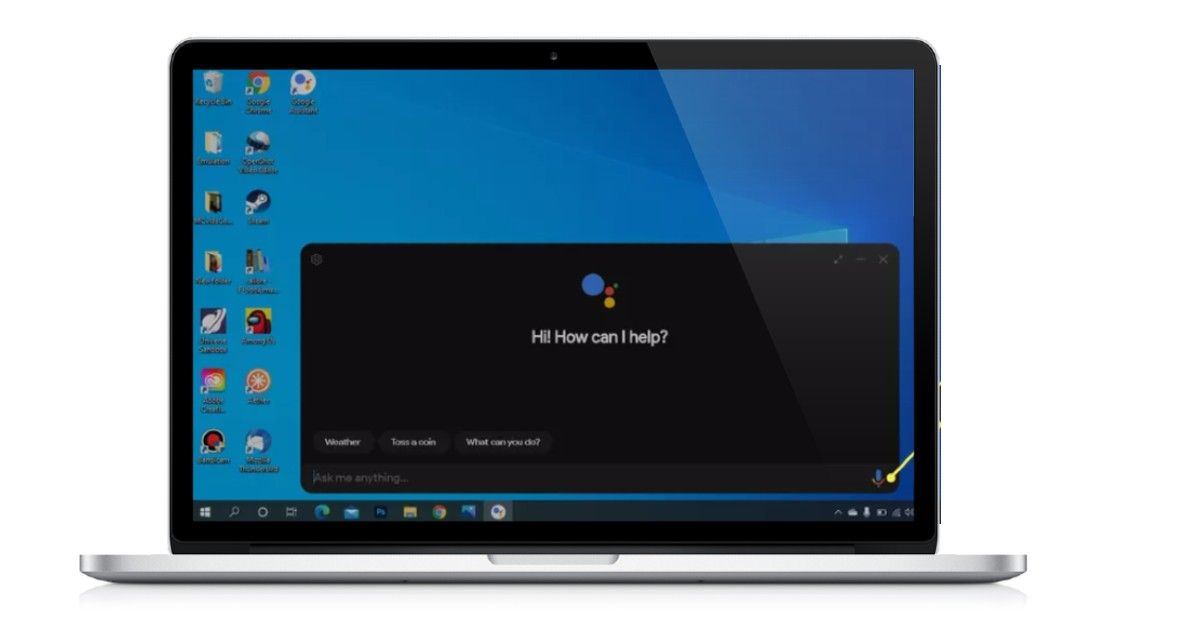
- Now, open a new browser tab, and download the Unofficial Google Assistant desktop client from Github. Run it and install with suggested instructions.
- Press Windows+Shift+A and the Assistant should appear. Click on Get started, click on proceed and then click on the Settings button to the top-left.
- Under the ‘Authentication’ field, manually select the ‘Key file path’. Here, select the JSON file downloaded at Step 6. Select save, select ‘Automatically’, and select Relaunch Assistant.
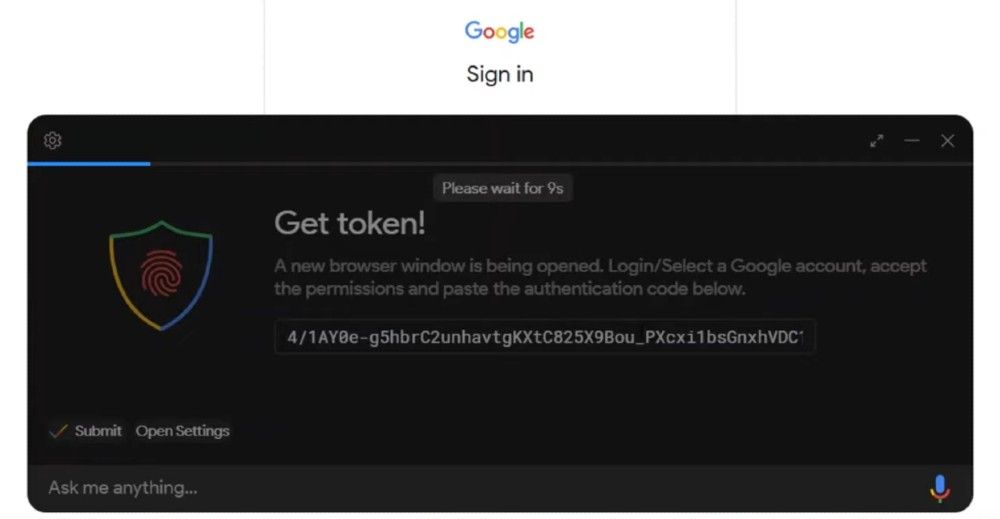
- A new browser window will automatically open. Once logged in to Google, select ‘Allow’ on the screen prompt. You’ll again be asked to confirm your choices, select ‘Allow’ again.
- Finally, you’ll be given a link. Copy it and paste in the relaunched Google Assistant, which is waiting for you to enter the key.
- Add the key, relaunch it, and you will now have a fully capable version of the Google Assistant running on your Windows 10 PC.
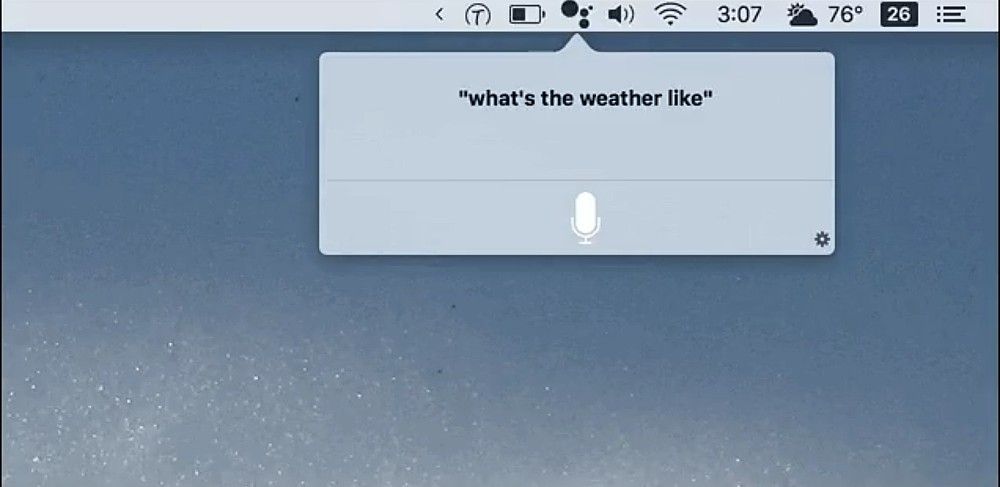
How to Install Google Assistant on macOS Laptops
In contrast, the process to install Assistant on macOS is rather simple, thanks to MacAssistant on GitHub. Here’s how the process goes:
- Head to the MacAssistant page on GitHub, and download the ZIP file available at the top.
- Once downloaded, double-click to unarchive the file, and drag and drop it to the Applications tab to install it.
- To open it, control-click on the icon in the Applications tab, click on open, and confirm to open when prompted again.
- The Google Assistant will now be running on your task bar at the top. For the first time, you’ll be required to sign in to your Google account.